Blender Lighting Tutorial 02: Smart Car Studio Lighting
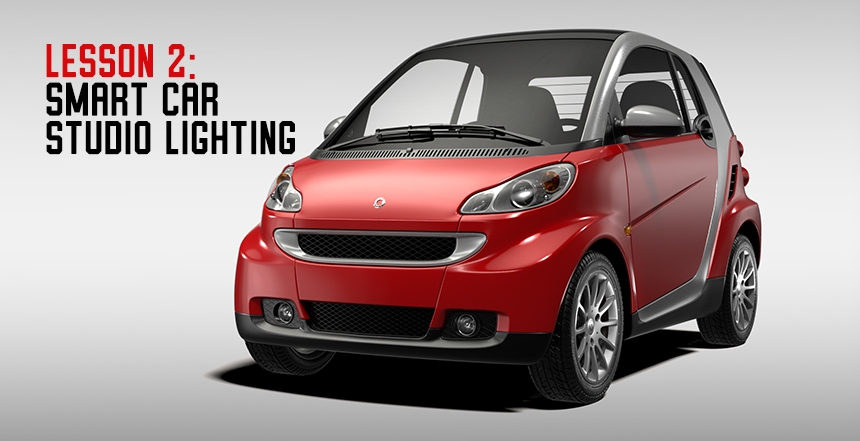
This tutorial will teach a Blender user to studio light a Smart Car.
To follow this tutorial you require at least Blender 2.83 on Windows, Mac or Linux. You need HDR Light Studio - Xenon Drop 1 (or higher) installed, including the Presets. Plus the HDR Light Studio 'Blender Add-on' installed and active in Blender.
Before completing this tutorial, make sure you have completed Blender Lighting Tutorial 01: Lighting the Bottle
You can download the Blender scene file here so you can follow along.
(Car model kindly provided by PK3D.com)
Here is a video tutorial or you can follow along with the tutorial document below.
LET'S GET STARTED
Open the demo scene provided by Lightmap - 'HDRLS Smart Car Studio - Start'
Start viewport rendering with Cycles.
Start HDR Light Studio, your interface should look something like this.
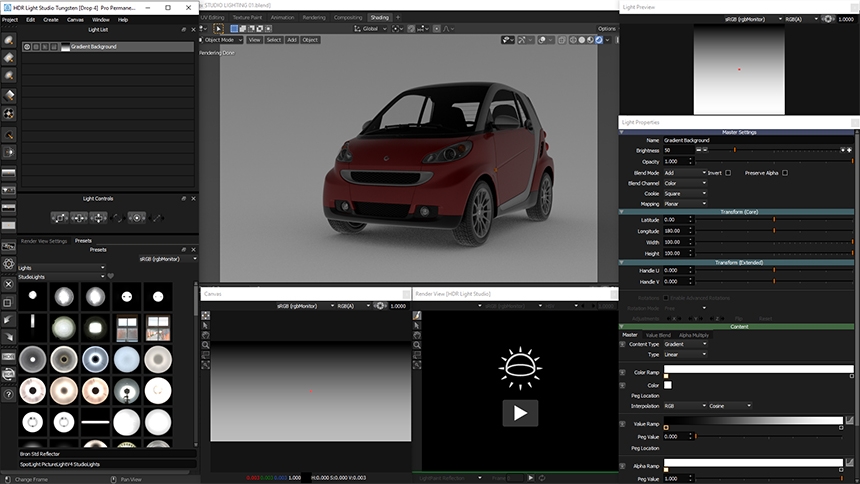
Press the Play button on the Render View to load the Blender scene into HDR Light Studio. Then Press Import.
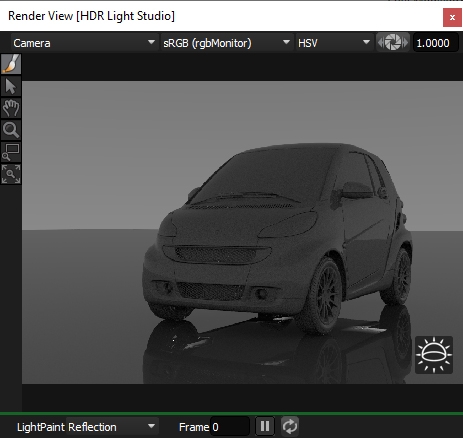
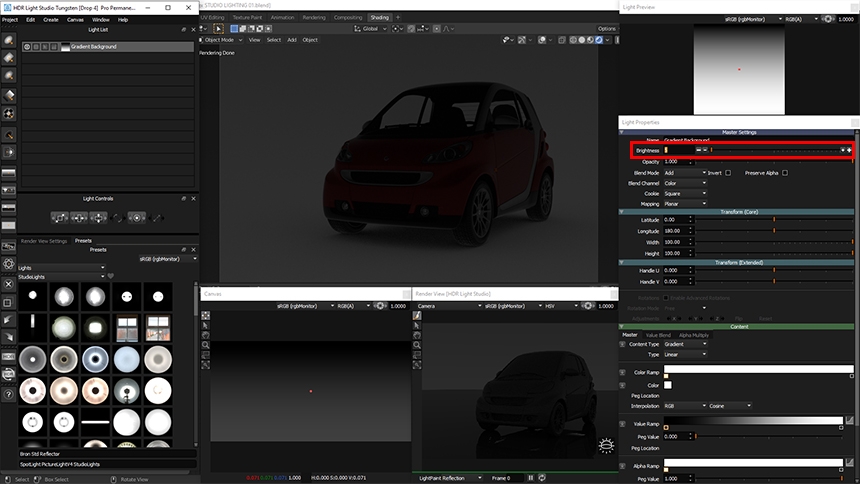
Let's reduce the brightness of the Gradient Background light, so we can still see the car, but so it's quite dark. I'll enter a value of 5.
Let's add a Softbox light over the top of the car as our primary light source.
Change the filter drop down to SoftBox in the Presets panel.
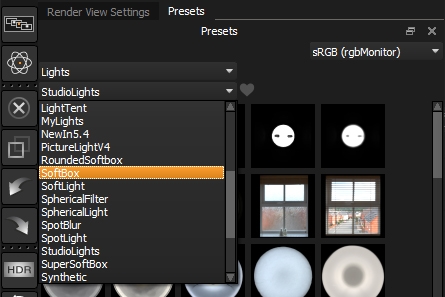
Drag and drop the 3rd preset Softbox light, Medium Softbox Diffused, onto the middle of the wind screen in the Render View.

When you move a 3D mapped light around the HDRI map, by default it is orientated to align with the surface of the environment light. But in this case, we want the light to appear horizontal over the top of the car, and not tilted, wherever we position it.
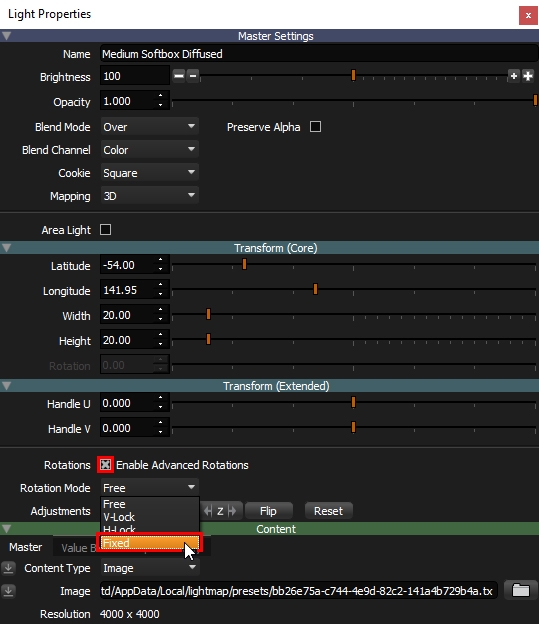
To get this effect we need to enable Advanced Rotations for the light in the light properties panel. We then have additional settings to orient the light.
Select rotation mode Fixed. Now wherever the light is moved on the HDRI map, it will always appear to be horizontal and aligned with the X and Y axis.
You can see the light in the wind screen now gives the impression it is horizontal over the top of the car.
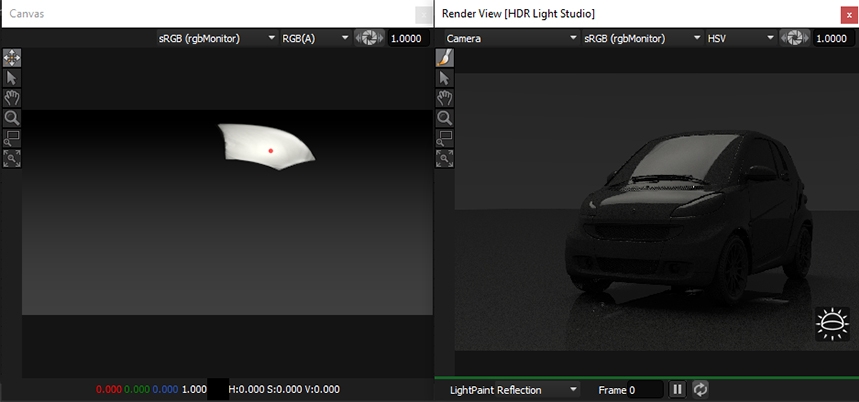
You can move the light around on the canvas to see this. As the light is placed near the horizon it becomes really thin because you are looking down the side of it.
Let's make the light bigger, using the proportional scale light control, click hold and drag to scale the light.

The light looks pretty good at around 50 x 50 size. I like how the light is reflecting on the wheel arch detail here.
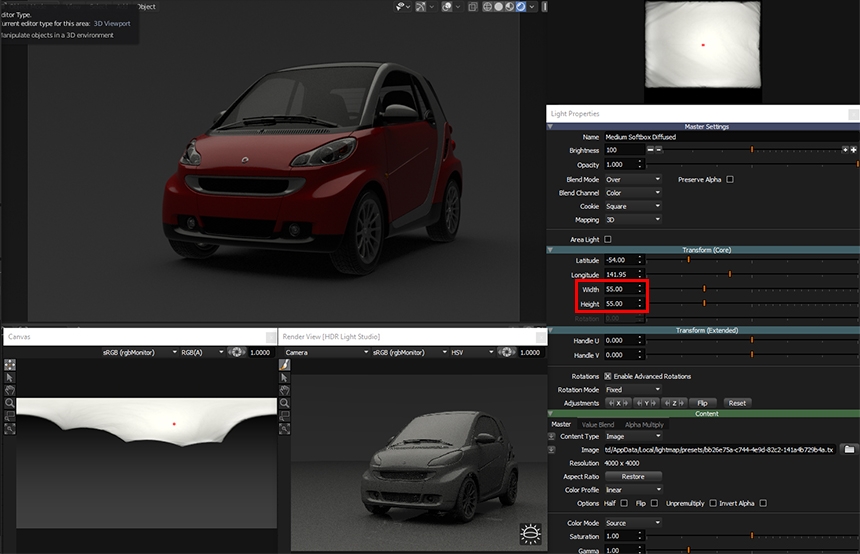
But the light needs a small adjustment, because the front edge is not positioned correctly.
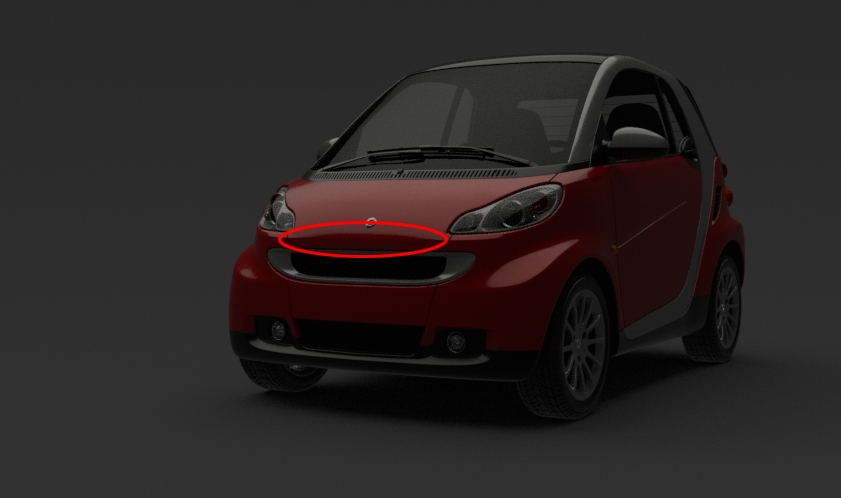
You can make smaller adjustments to the location of the light is by moving its Handle in the Light Preview. The handle is the orange dot at the centre of the preview.
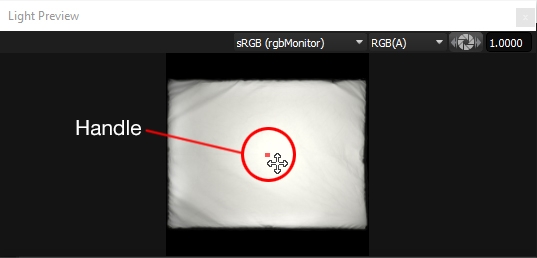
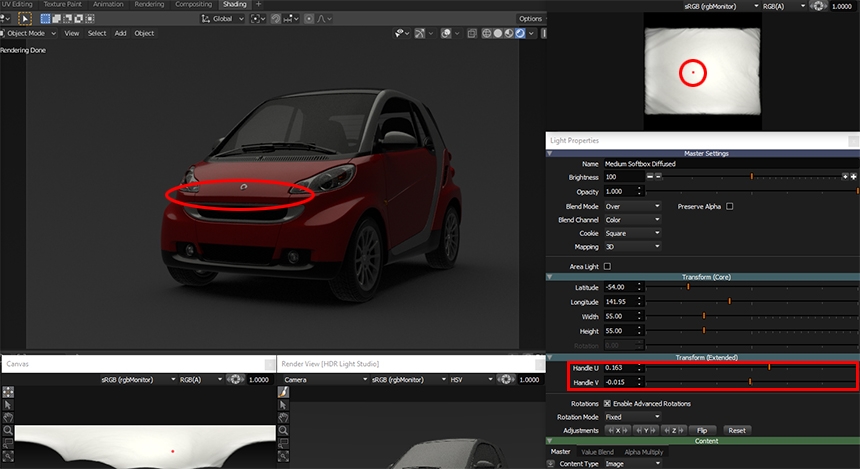
Drag the handle and the light moves relative to this handle. The handle can be moved all the way to the edge of a light. Try dragging the light handle to position the light better.
Here you can see the handle has been moved to the left of the light preview, and the issue is now resolved. There is a nice clean edge in the front of the car now.
The light looks pretty flat in the reflection and we need to make the reflection look more interesting.
The appearance of a light is controlled by the Content section of the Light Properties.
The Master content is all you need for most lights, but to take more control you can also use the Value Blend or Alpha Multiply settings.
In this case we are going to take more control over the brightness and use the Value Blend settings.
Enable Value Blend with the check box.
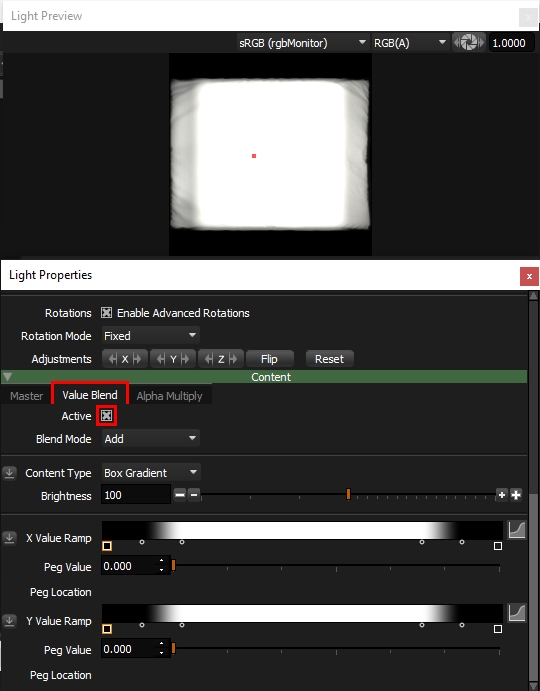
We are going to use a radial gradient to control the brightness of this light and create a hot spot. This will give the light more character when seen in reflections in the car.
Change the blend mode to Multiply so that the gradient values of the Value Blend content will multiply with the values in the Softbox texture.
Change the content type to Gradient, and the type to Radial.
Change the first peg on the value ramp to 1, and the last one to around 0.1
Change origin X and Y to 0.5 and 0.5 to centre the radial gradient
Change the extent until the corner of the Softbox go darker.
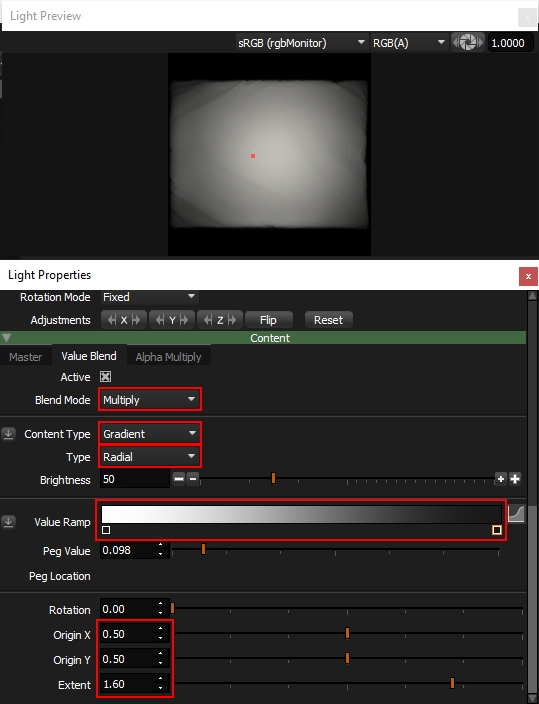
Now, press the graph button on the value ramp to edit the gradient further.

Change the mode to bezier and double click to add 2 more pegs and adjust them to make a curve that looks like this.
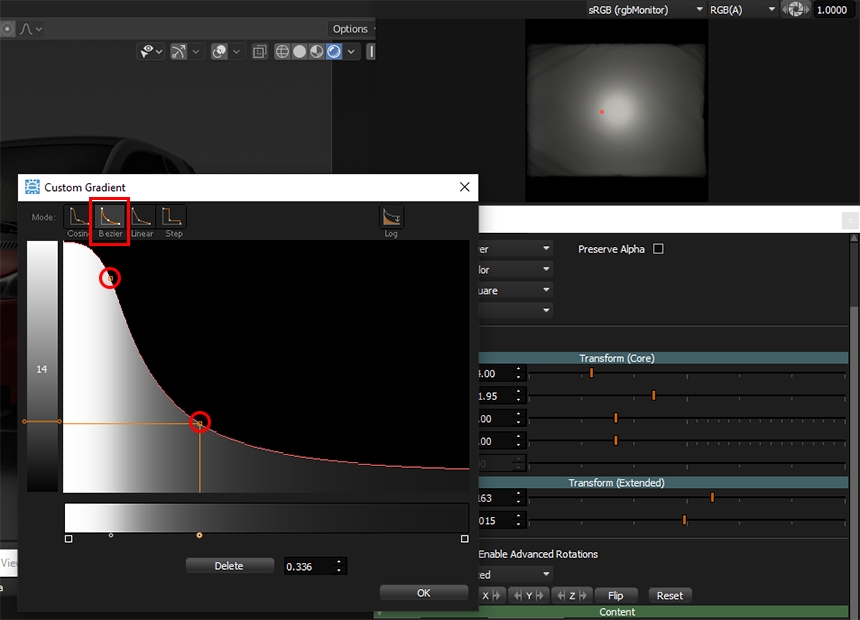
Then press OK to close the panel.
Now let's increase the brightness of this Value Blend content, to control how much it is boosting the brightness of the Softbox texture. A value of around 450 looks good.
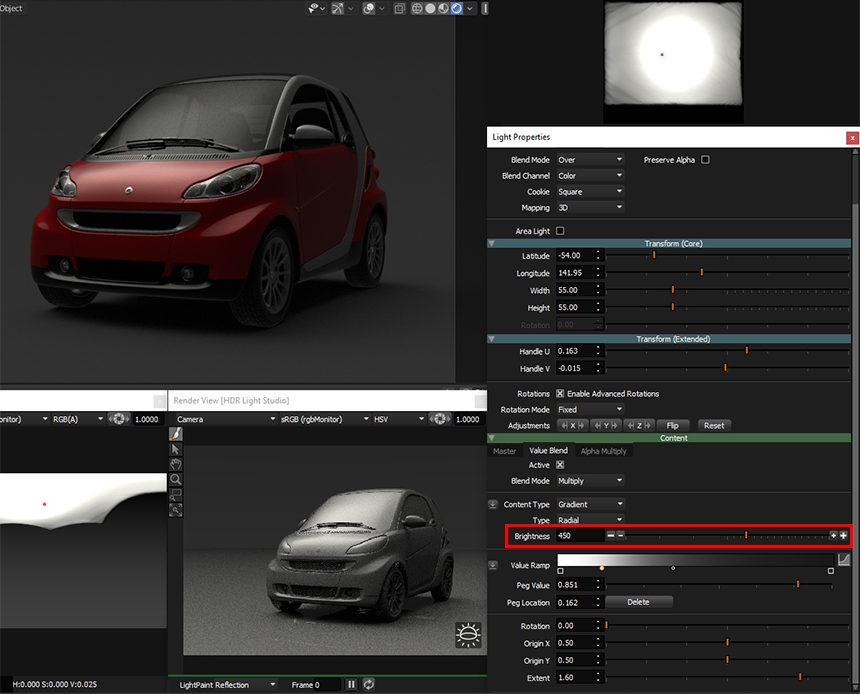
You can check the effect of the value blend by turning it on and off, using the active check box. So you see a before and after.
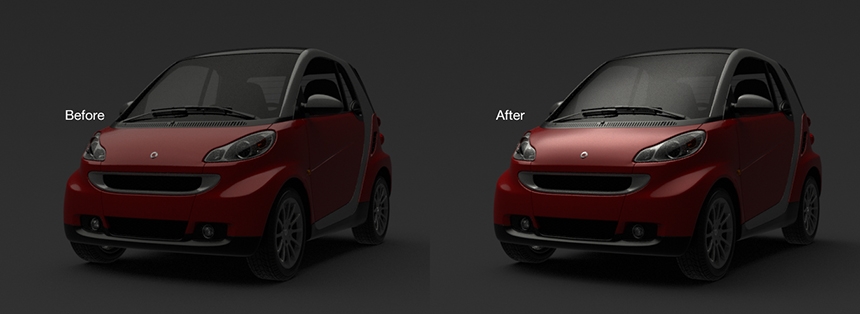
You can click hold and drag on the exposure button in the Light Preview panel, to explore the brightness of this light.
You can see we have made a nice hot spot.

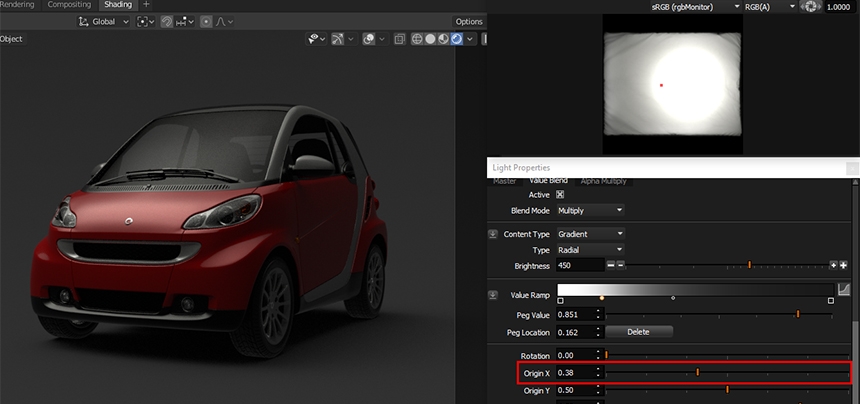
We can move this hot spot around the light by moving the origin X and Y sliders. Move it around and see if it creates a better effect. Here we moved the Origin X to 0.38.
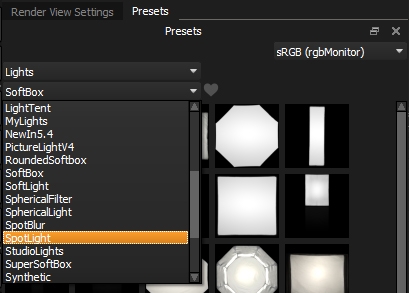
In the Preset filter, let's select SpotLight.
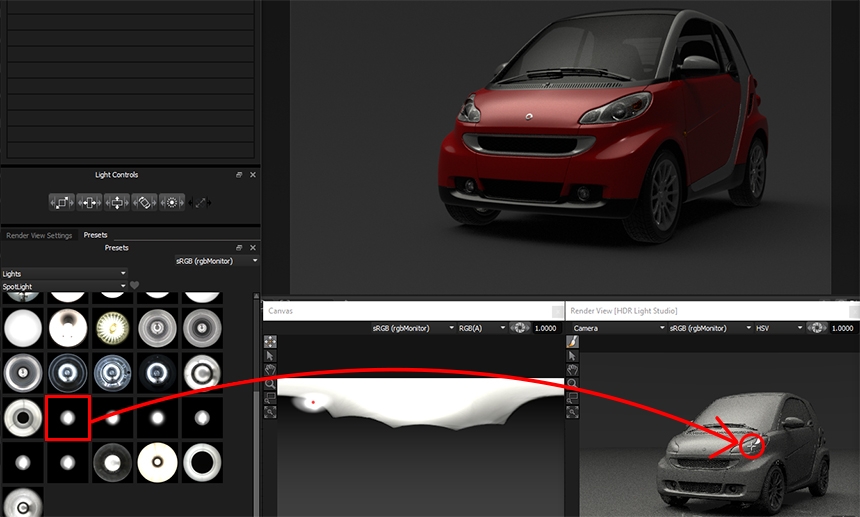
Drag and drop one of the spot blur lights onto the middle of the headlight on the right of the car.
It has created some nice highlights on the model.
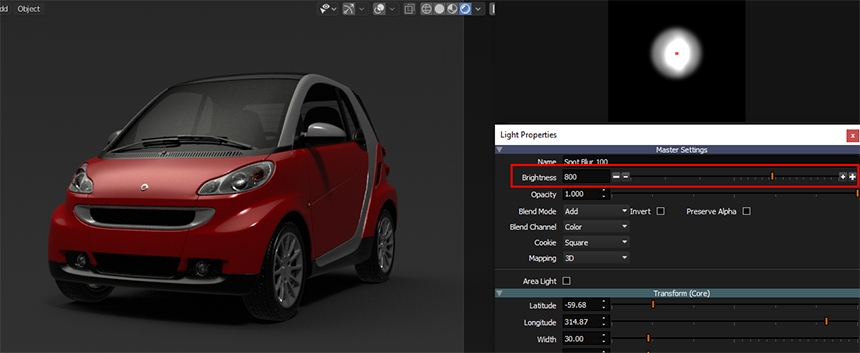
Increase the brightness by a few f-stops using the + button until it brings the paint alive some more. A value of 800 looks good.
Next we need some light on the front left bumper.
Select Synthetic filter on the Presets and choose Torch Light, which provides a light that looks like an indirect light coming from a spot light. Drag and drop this on the front left bumper area.
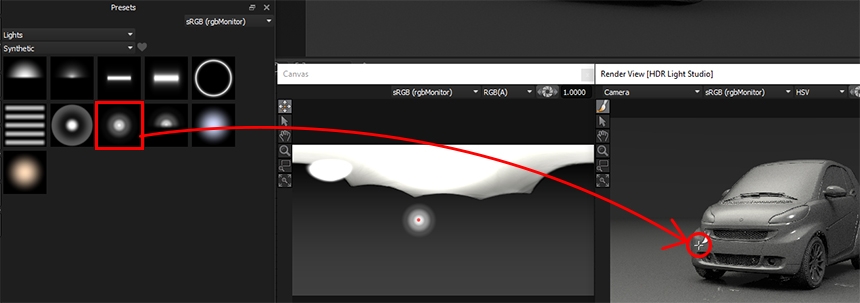
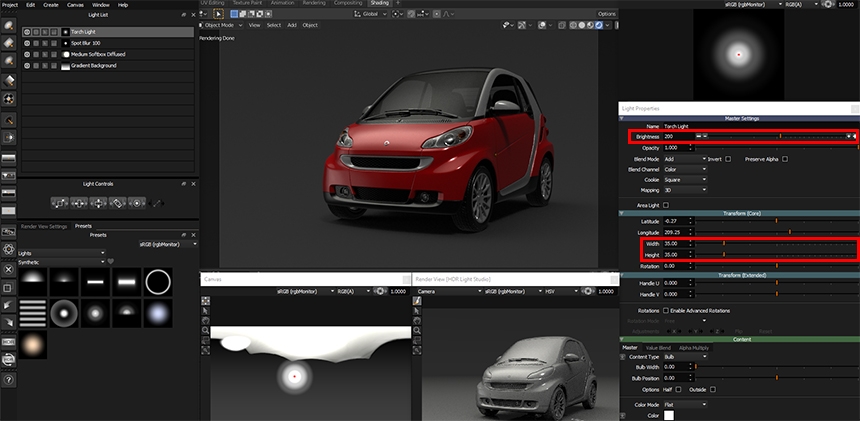
Let's scale that light to be larger, 35 x 35, and increase the brightness by one stop using the + button, to 200.
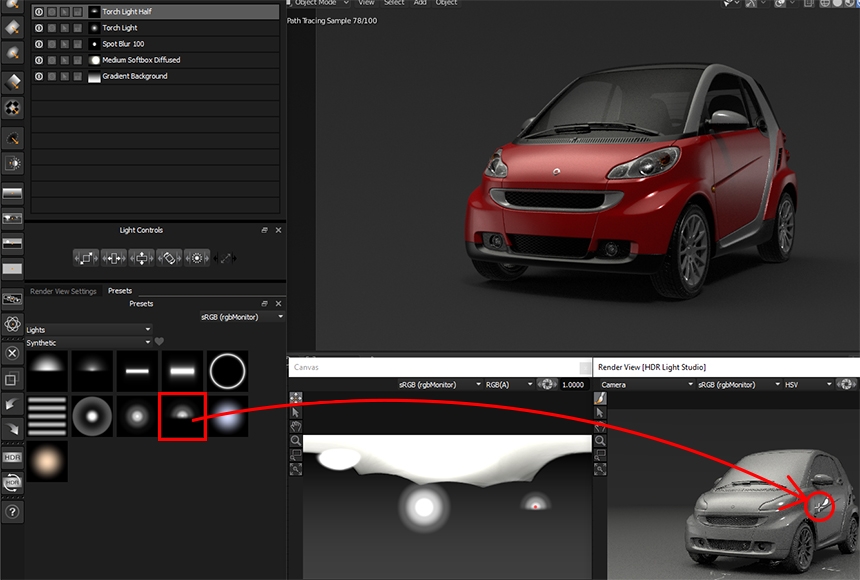
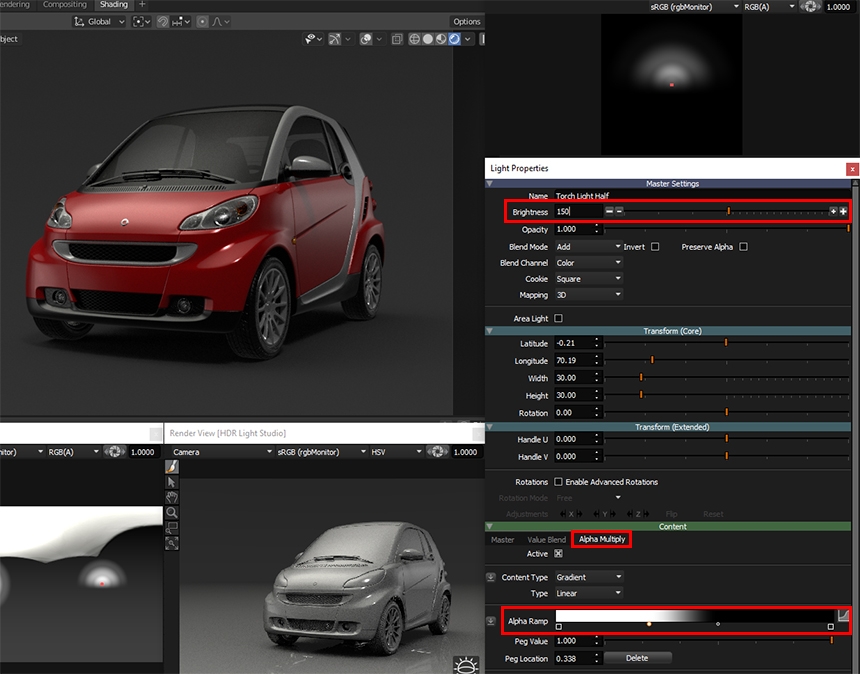
Next let's drop the Torch Light Half on the right panel of the car.
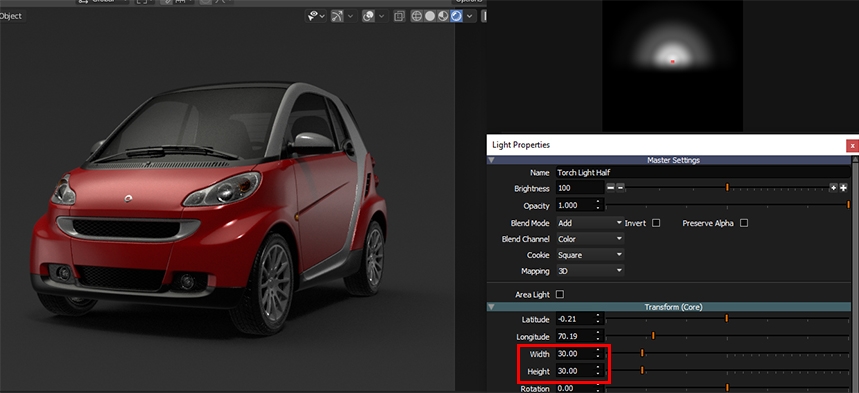
Let's increase its size to 30 x 30.
If we go to the Alpha Multiply tab for this Torch Light Half, you can see it has a ramp that is creating a soft cut in half for the light. Adjust this ramp until you like the appearance in the panel of the car. We will increase the brightness up to 150 also.
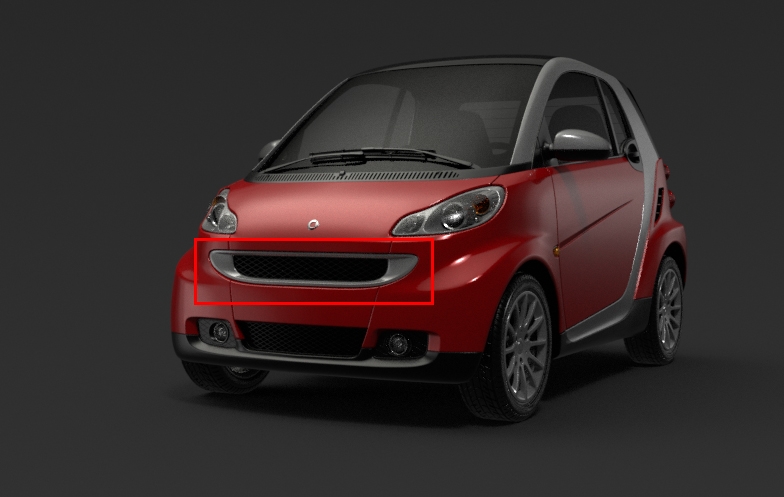
When looking at the car now, we can observe that the front grill is looking pretty dim.
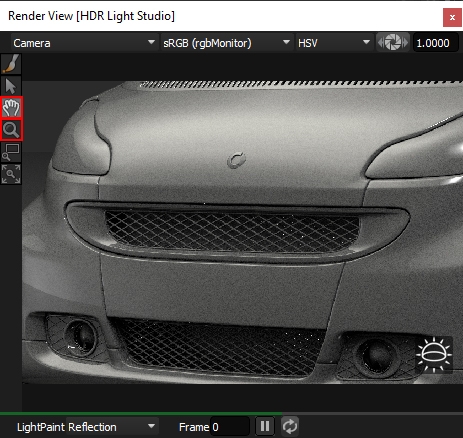
Lets zoom into that area on the Render View using the Zoom and Pan to get the area we want. Once this is done select the LightPaint tool again in the view.
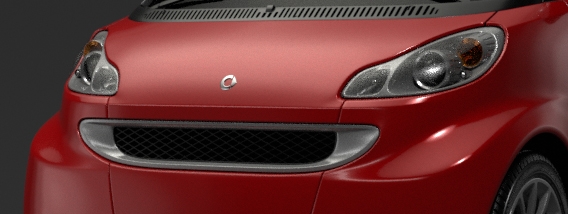
Lets drag and drop a Kino 2 light onto the grill. Adjusting the position with LightPaint you can find a sweet spot where the light creates a really lovely highlight. We will boost the brightness to 400.

Tha detail looks nice.
The right A pillar would benefit from a highlight to accentuate its shape. Let's duplicate the earlier placed spot blur light and place this light on that pillar.
Select and duplicate the light with CTRL + D
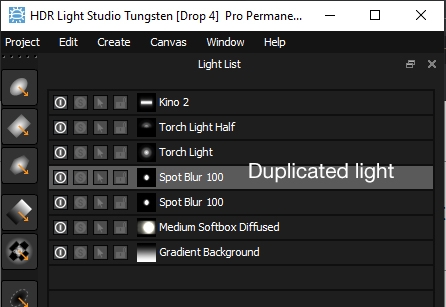
Pan the render view , to show the pillar.
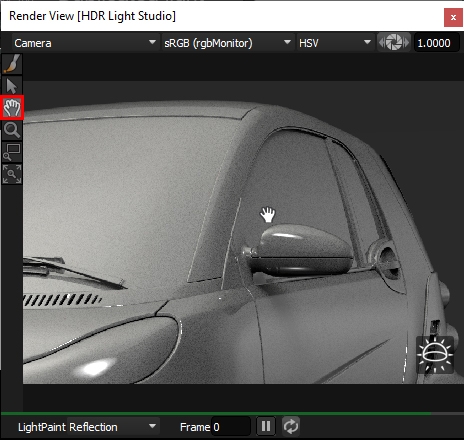
Choose the LightPaint tool and click position the light.
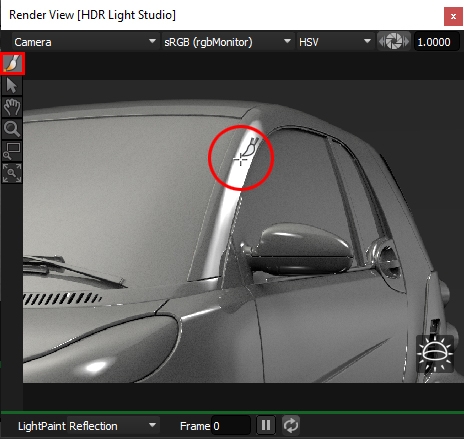
We can see that this light is too big for this detail. Scale it down to around 10x10.
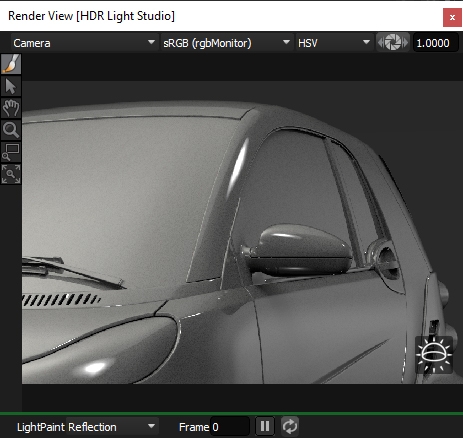
Let's solo the light to make sure it is not creating any unwanted reflections elsewhere on the model. We can see the other highlights it creates look good.
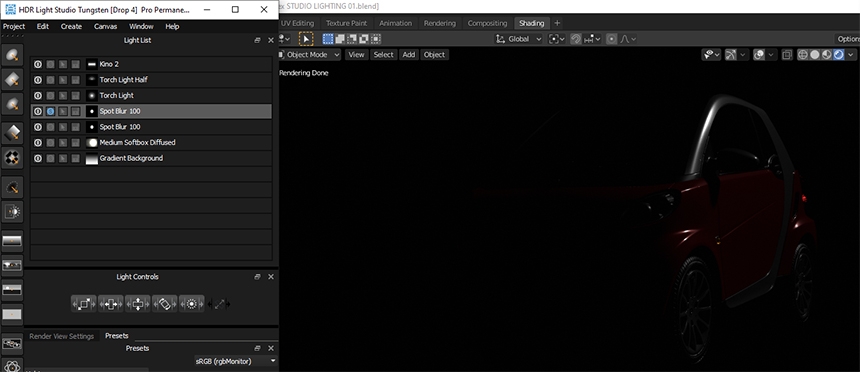
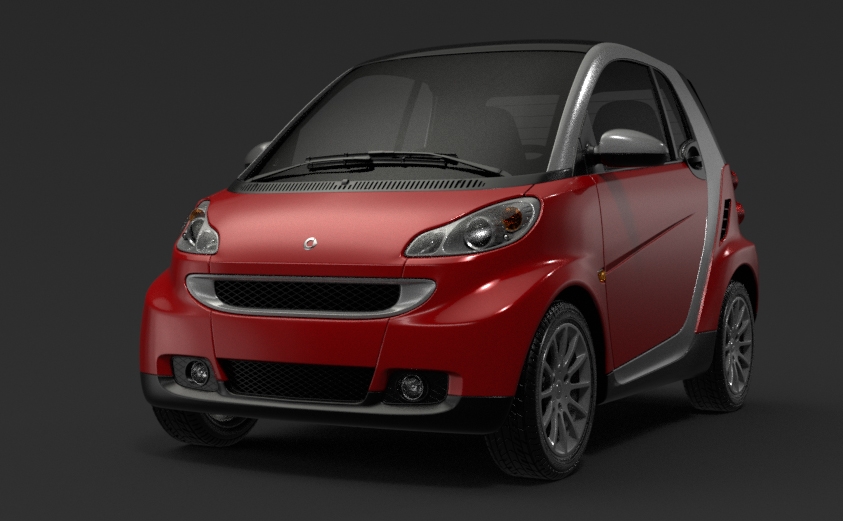
Unsolo the light and take a look at the current state of the lighting. The wheels on the car are looking dull. Let's fix that now.
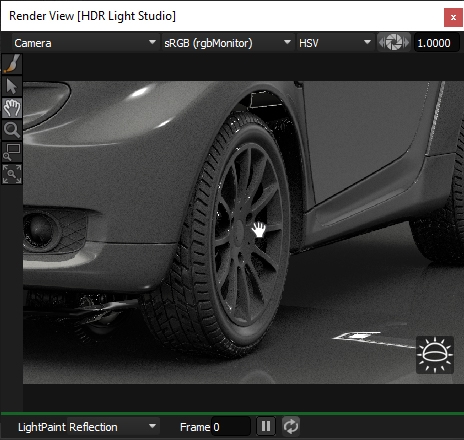
Let's pan the render view to the front wheel.
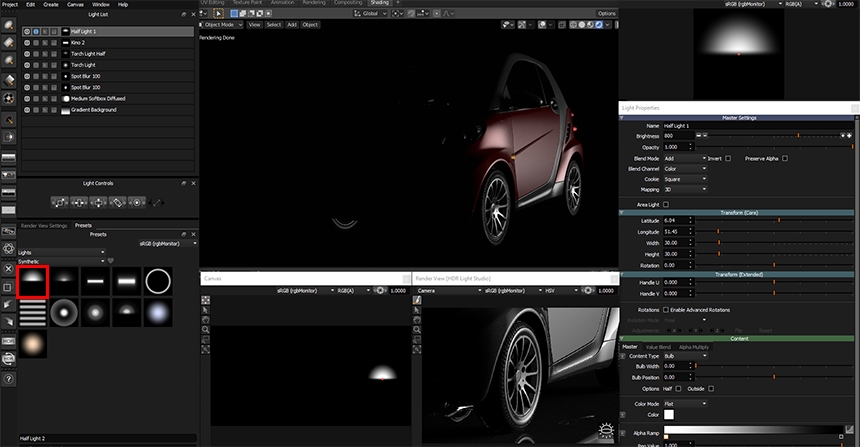
Drag and drop Half Light 1 light onto the wheel. Solo the light and let's see if we can make the wheel 'pop'. You can see the light is reflecting in the whole side of the car in the Blender Render view.
Lets make it brighter anyway, to make the wheel come alive. A brightness of 800 is good.
AREA LIGHTS
OK, so now we want to the light to affect just the wheel. To create a more local lighting effect, we need to enable the Area Light setting on the light. This will build a 3D Area Light in Blender mapped with our HDR light appearance. We can then bring this light close to the wheel, so it is reflecting and lighting only the wheel, and not the whole side of the car.
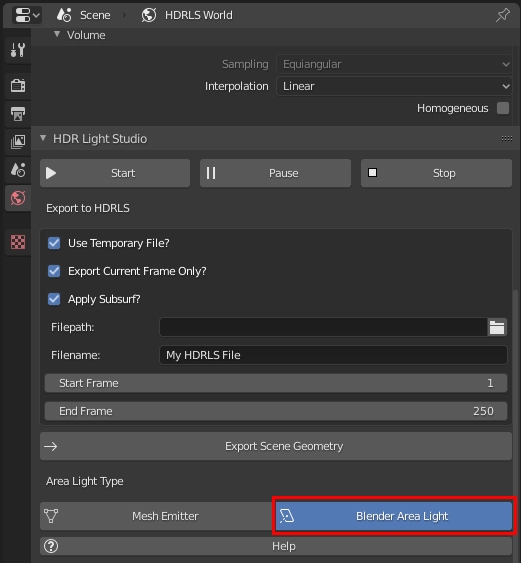
The HDR Light Studio add-on can create 2 types of area lights in Blender, and you can choose which is right for you and your project. Put simply, if you make Mesh Area Lights, they can be seen by the camera, if you make Blender Area Lights, they can not.
For this project, we do not need to see the lights directly, only their reflection and illumination effect. So I will choose Blender Area Lights as the type on the HDR Light Studio panel in Blender. You can switch this at any time and the lights will be rebuilt on the format you choose.
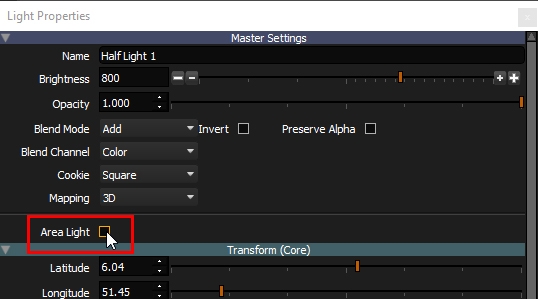
Now enable the Area Light setting on the light properties panel in HDR Light Studio.
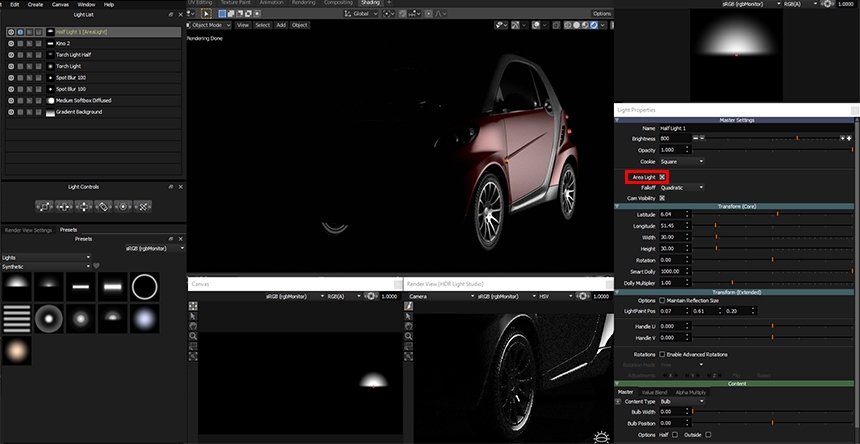
Once we enable the Area Light setting, we can't see much difference.
But a lot of things have happened in the background with this single setting enable.
The light has been removed from the HDRI map shared with Blender and an Area Light has been created in Blender, mapped with the HDR image. The light is far away from the car to start with and is aligned with where the light was on the HDRI map. So the shot actually looks much the same for now.
The Canvas in HDR Light Studio, still shows the light. However, this is not on the HDRI map any more, it is here for visual reference, showing you it is there. The light in the list is shown in yellow text and is labelled as an area light.
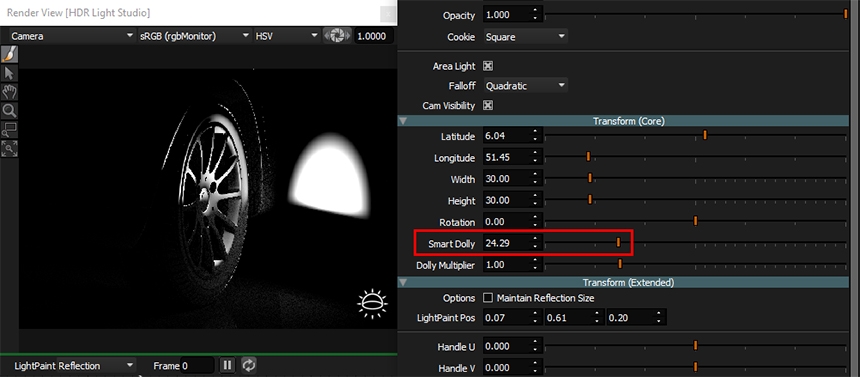
The primary control for the distance of the light is the Smart Dolly slider. At the moment the light is huge but very far away. As we bring the light closer, if we kept the light the same size, it would be huge and way to bright for our model... as it would appear so much larger in reflections and create way too bright illumination. So we scale the light smaller as it gets closer, to keep the same illumination contribution. This all happens automatically when using the slider.
Let's reduce the Smart Dolly value to bring the light closer to the wheel.
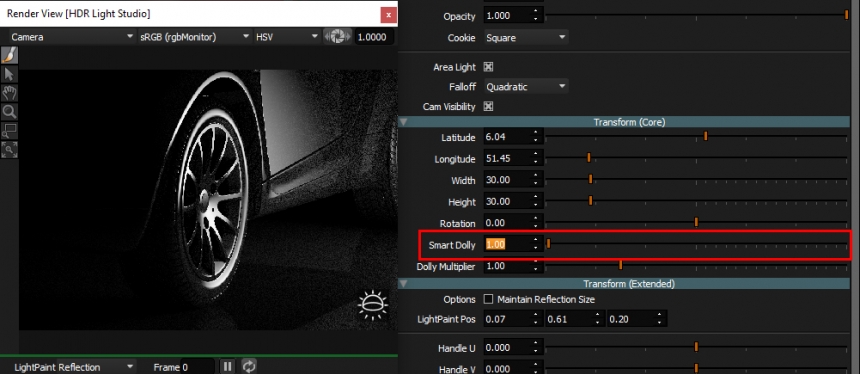
But we have a problem. The slider values mean a very small value, like 1, still puts the light too far away from the wheel. We don't have the right scale of distance control needed for this size model in Blender.
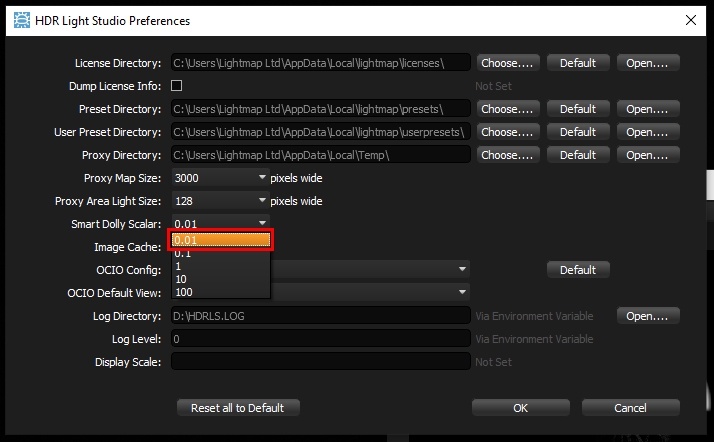
There is a solution. If we open HDR Light Studio preferences. There is a scale setting we can adjust.
Change the Smart Dolly Scalar from 1 to 0.01, and press OK.
Now with the slider at 1000 the light is far away, but at lower values, between 50 and 0, we have a nice amount of control over the light near the wheel.
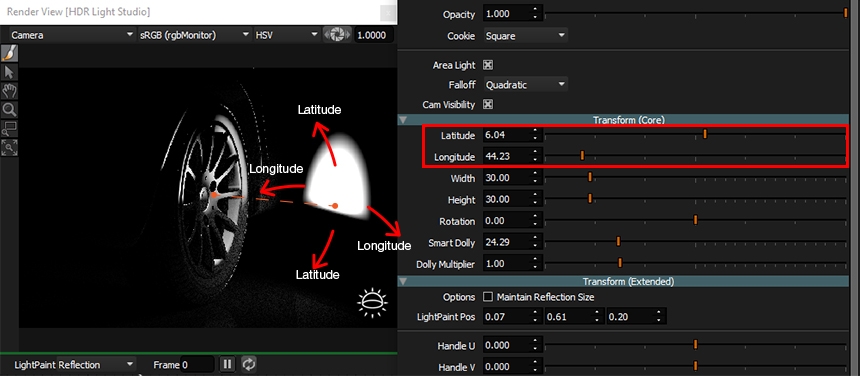
The light is facing the LightPaint position where the light was dropped. If you want to make adjustments to the position you can use the Latitude and Longitude sliders to orbit the light, just like moving a light around the HDRI map.
Once you are happy with the light position, let's unsolo it.
We can see the car is looks great with the wheel having some light on it now.
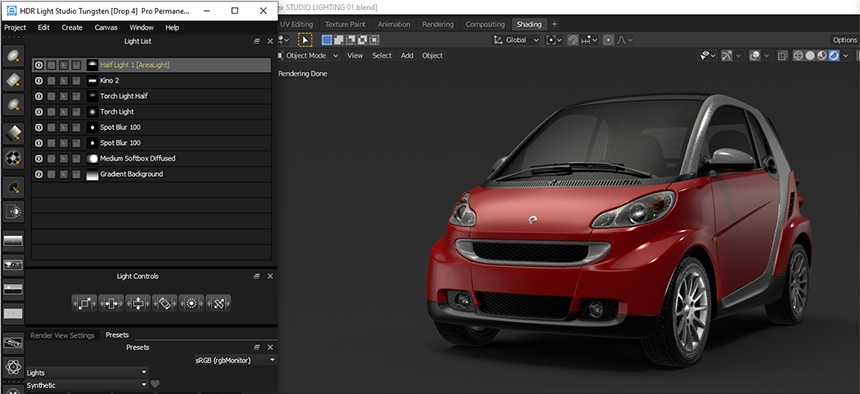
We can turn off the light, and check what it looked like before. This will hide the area light in Blender too.... area lights are totally integrated into how HDR Light Studio works... everything you do in HDR Light Studio is automatically kept in sync in Blender.
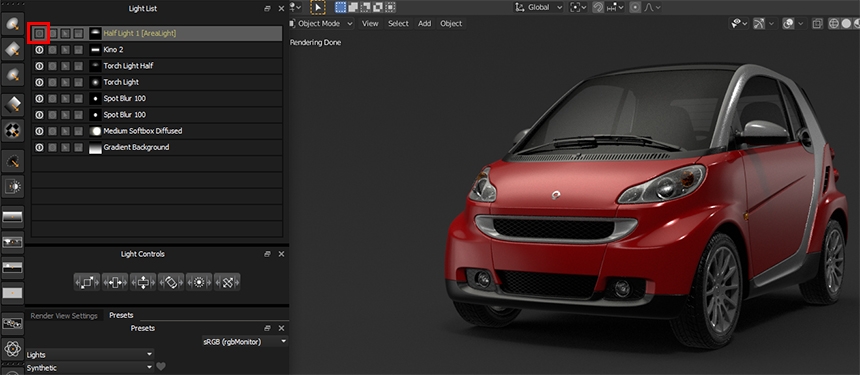
Turn the Area Light back on, it makes a big difference.
Duplicate this Area Light.
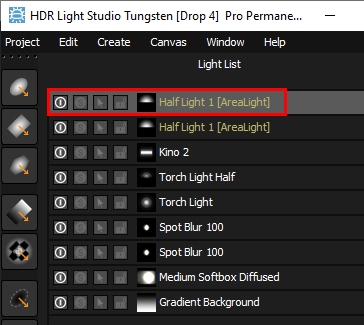
Pan in the Render View to the rear wheel.
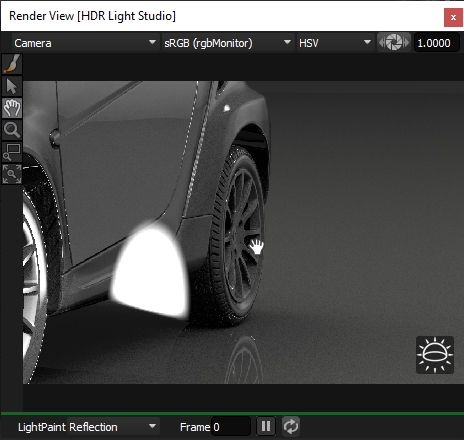
Enable the LightPaint tool and click on the rear wheel. Make some adjustments to the position, scale and the brightness until you feel the area light is creating a good effect.
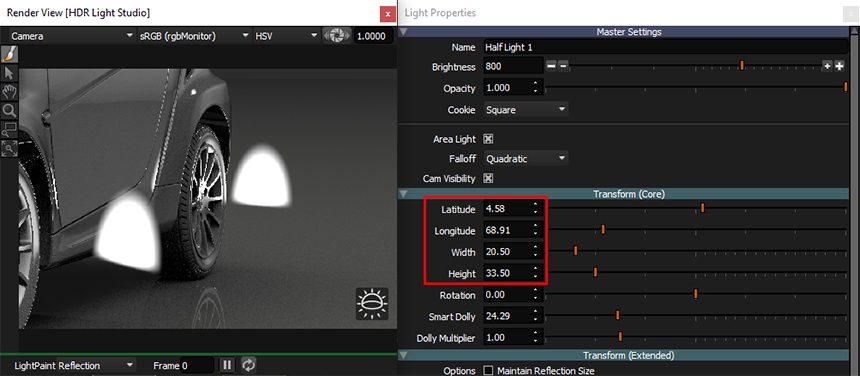
Learn more about area lights in Blender and their features.
To improve the lightihng... now it's a case of looking at the render and deciding what areas need improving or 'bringing to life' with lighting.
I love the highlights on the front right details and feel we could bring some of thoser highlights to the front left also... so let's try it.
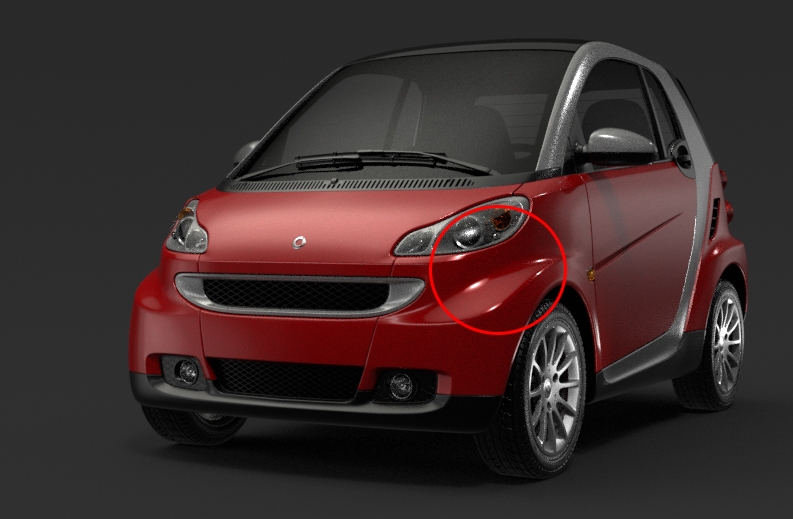
We are going to duplicate the light creating the highlights on the front right.
If you can't remember which light is creating that effect. Solo the lights in the light list until you find it.
It was the first SpotBlur light we placed.
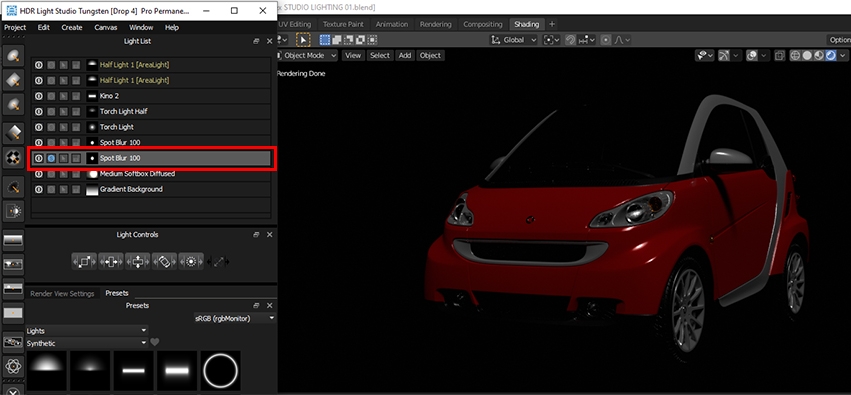
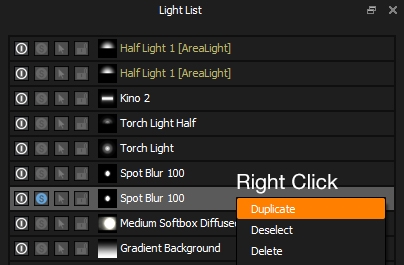
Duplicate the light (either right click on the light in the list and select Duplicate, or select it and use CTRL + D)
Pan the Render View to show the front left bumper area. And choose the Lightpaint tool.
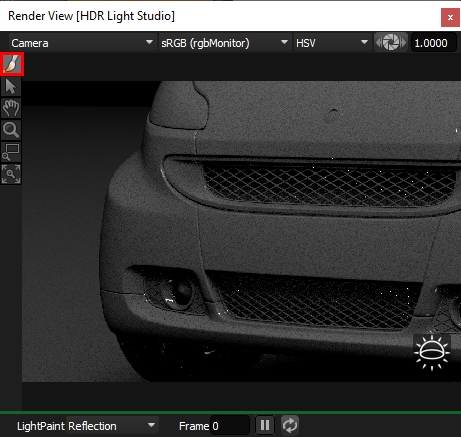
Click or drag on the 3D model to discover a position that creates some nice highlights on that front bumper area.
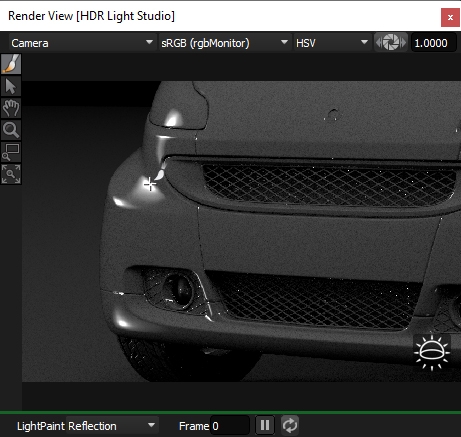
Remember you can make small adjustments to the position via the Canvas too if it's easier.
We need to reduce the size of this light, as the highlight it too large, make it 20 x 20.
Unsolo any lights and have a look. This looks good.
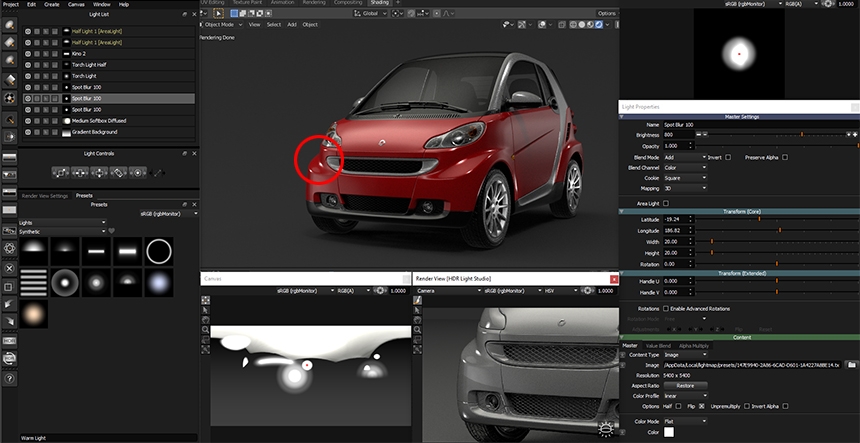
The dark grey background is looking pretty dull, let's put a gradient behind the car, to create a better backdrop.
Make a Gradient Light from the tool bar and place it behind the car using LightPaint in Rim mode.
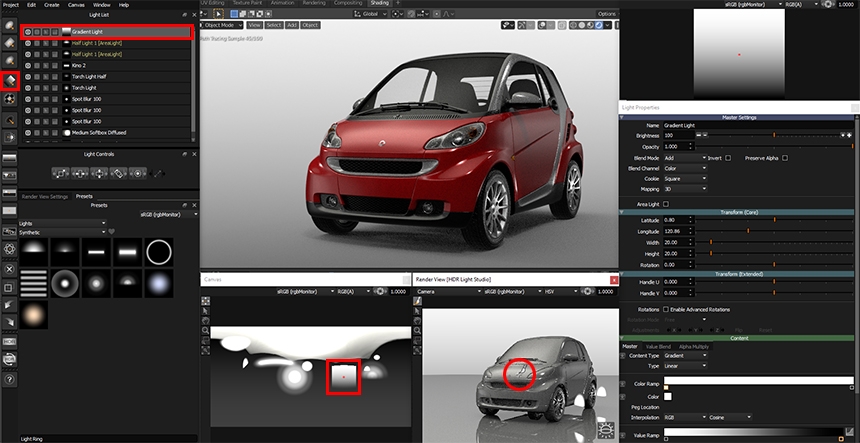
Turn on Alpha Multiply content on this light and the default Box Gradient will soften all edges of the light - so it doesn't create hard edges in reflections.
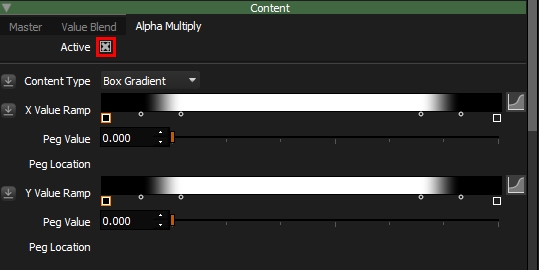
Increase the size of the light so it fills the background of the shot. 30 x 30 is a good size.
Adjust the Value Ramp on the Master content to create a pleasing background effect.
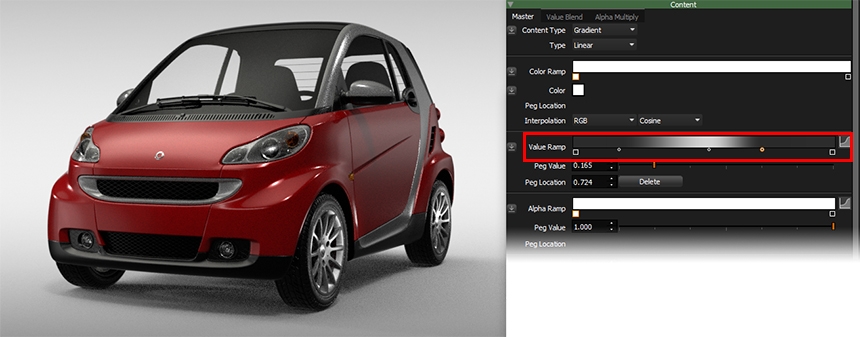
Now that the background is brighter, the car now looks too dark relative to this.
The whole lighting design needs to be brighter.
Instead of adjusting each light individually to be brighter, there is a very simple way to make all the lights on the HDRI map brighter. This will not affect the area lights, but the wheels are bright enough anyway.
Make a Flat Background light, and drag it down the Light List under the Gradient Light that is behind the car.
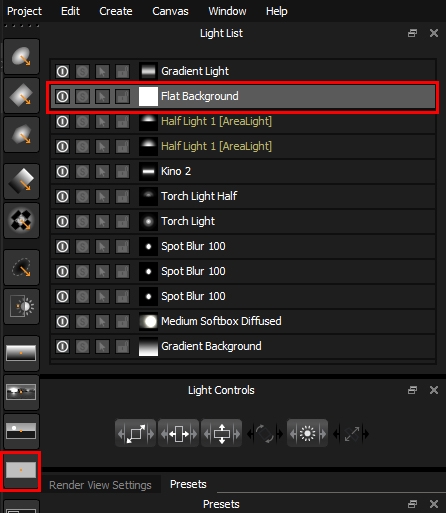
Change this Flat Background light blend mode in the Light Properties to Multiply.
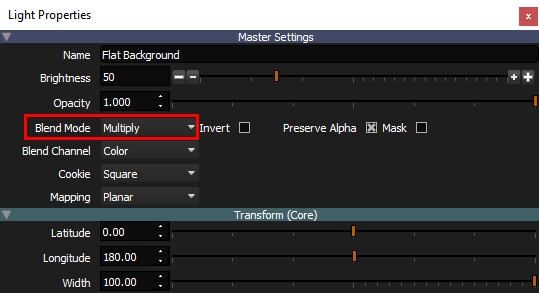
Now this single light is multiplying the brightness of the whole HDRI lighting design.
Increase the brightness of this light until the car lighting balances with the background. A value of 200 looks good, and has doubled (200%) the brightness of the lights on the HDRI map beneath.
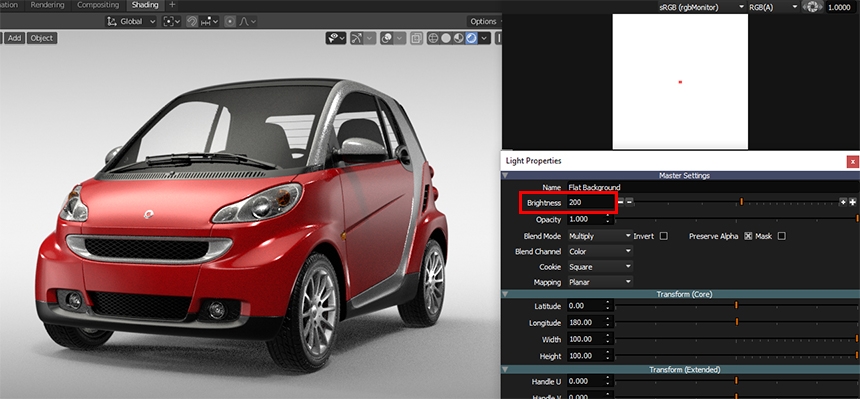
Lighting a shot never feels complete, but we are going to stop here. You may want to change the balance of the brightness of lights and further refine it, that's up to you.
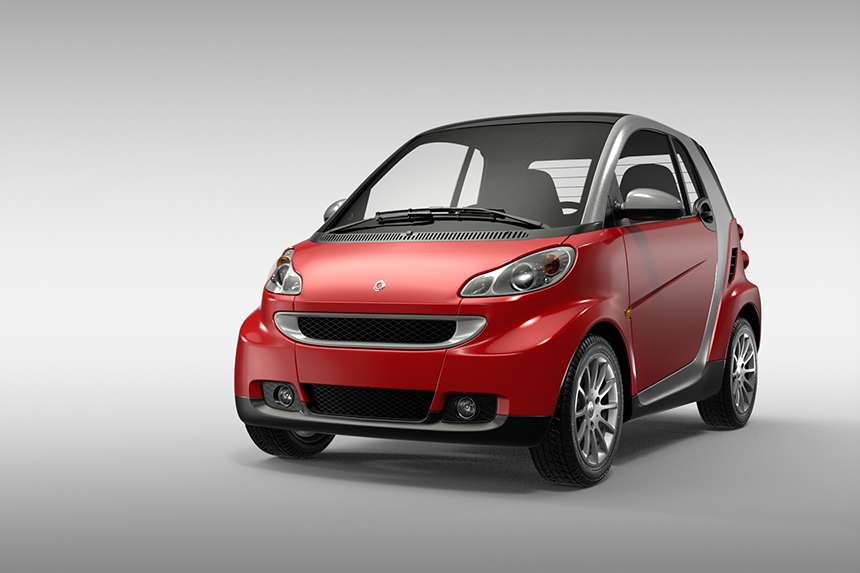
Here is a higher quality render of our shot, still using the live HDRI map from HDR Light Studio.
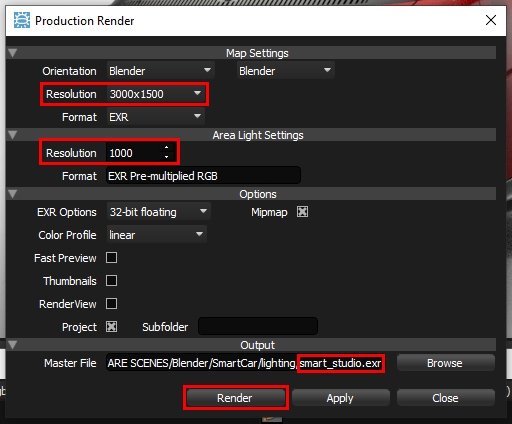
Press the HDR button and produce the final HDR lighting at a resolution of 3,000 x 1,500. With Area Light texture of 1,000. A HDRI map and 2 HDR textures will be created, to go on the area lights.
You can now close HDR Light Studio and render your final image in Blender.
OPTIONAL EXTRA FOR MORE ADVANCED BLENDER USERS
To make the shot look even better...
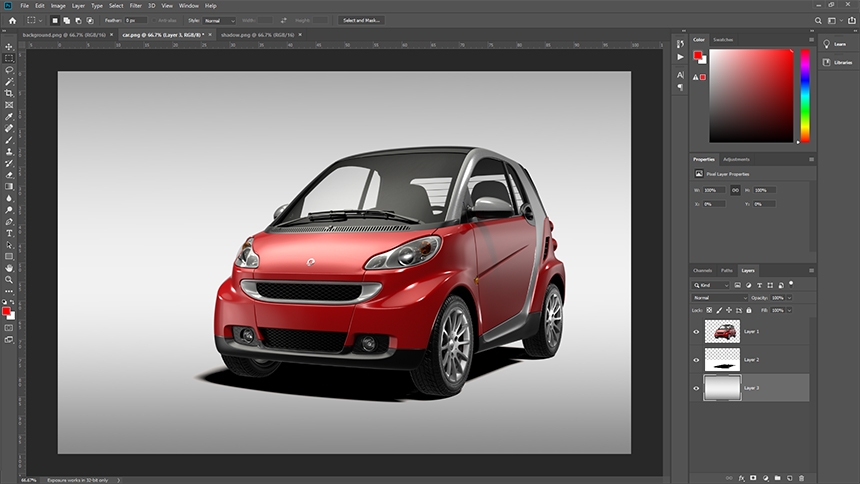
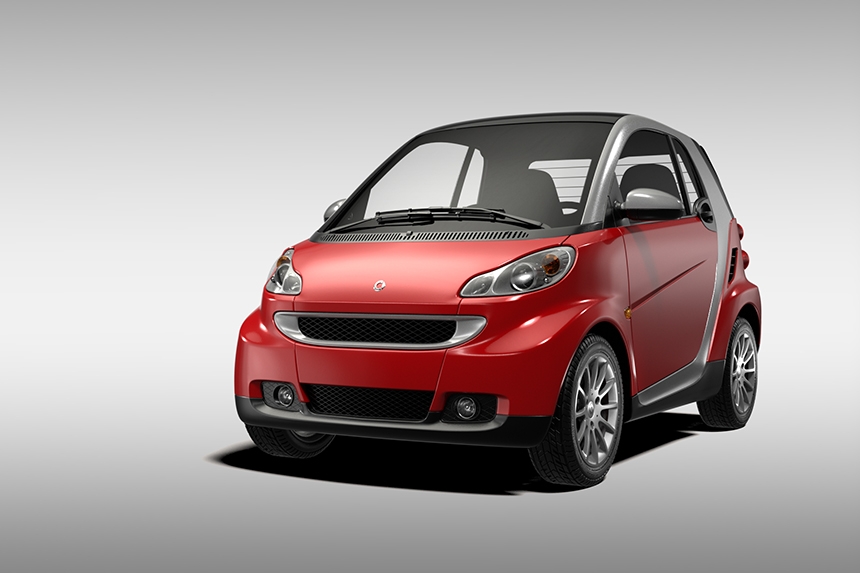
A good floor shadow can make a big difference to the effectiveness of the image, it grounds the car really well and fixes it to the ground. Because there are many lights coming from different directions, the floor shadow is not strong on the image at the moment. A final step would be to render 3 separate images and combine them.
You need the car on it's own.
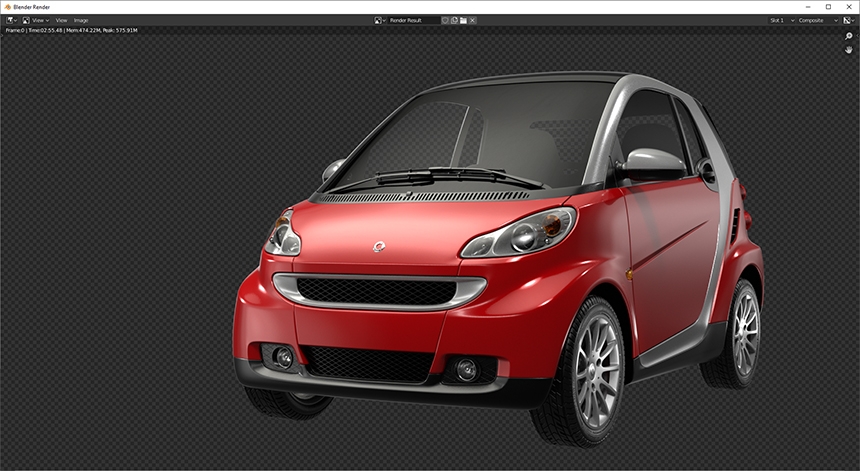
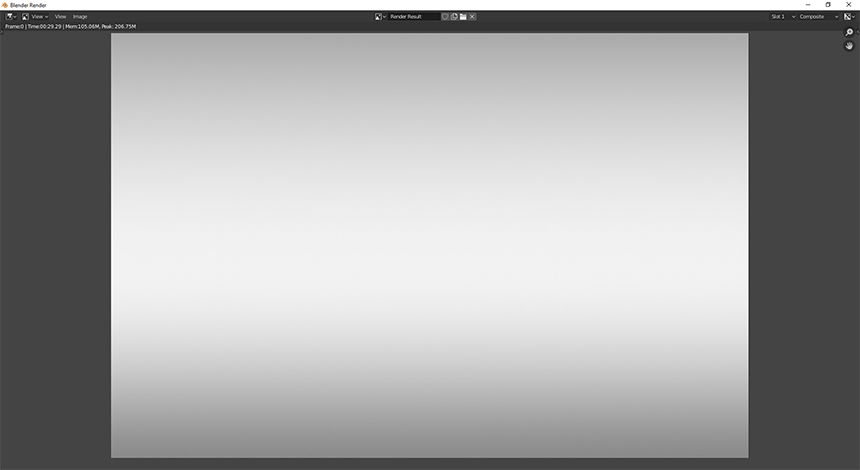
You need the background (just the visible HDRI map) on it's own.
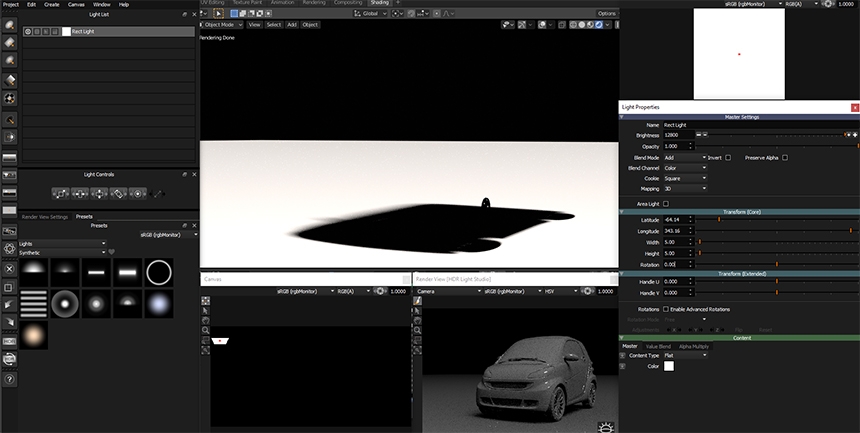
Finally you need to use HDR Light Studio to create a single bright light that creates a nice looking floor shadow on a solid floor. You can use the indirect only setting to hide the car from the render, but still see it's shadow in Blender.
Blend these images together and you get a much better result with a nice clean floor shadow.
See more Blender lighting tutorials.
Recommended:
Blender Lighting Tutorial 03: Smart Car - Enhancing a HDRI Map
This entry was posted in Lighting Tutorials and Demos and tagged Blender.

