Blender Lighting Tutorial 03: Smart Car - Enhancing a HDRI Map
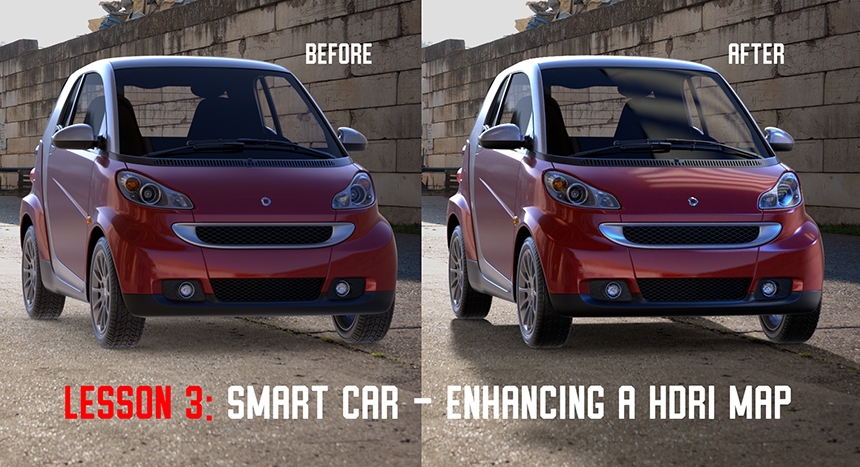
This tutorial will teach you to enhance an existing HDRI map to improve it's lighting effect.
(Model kindly donated by PK3D Studio. Lo-res HDRI map and backplate image donated by Apex Automotive)
To follow this tutorial you require at least Blender 2.83 on Windows, Mac or Linux. You need HDR Light Studio - Xenon Drop 1 (or higher) installed, including the Presets. Plus the HDR Light Studio 'Blender Add-on' installed and active in Blender.
Before completing this tutorial, make sure you have completed Tutorial 1 and Tutorial 2.
You can download the Blender scene file here so you can follow along.
Here is a video tutorial or you can follow along with the tutorial document below.
LET'S GET STARTED
Open the HDRLS_Smart_HDRI_Start.blend scene provided.
Start viewport rendering with Cycles.
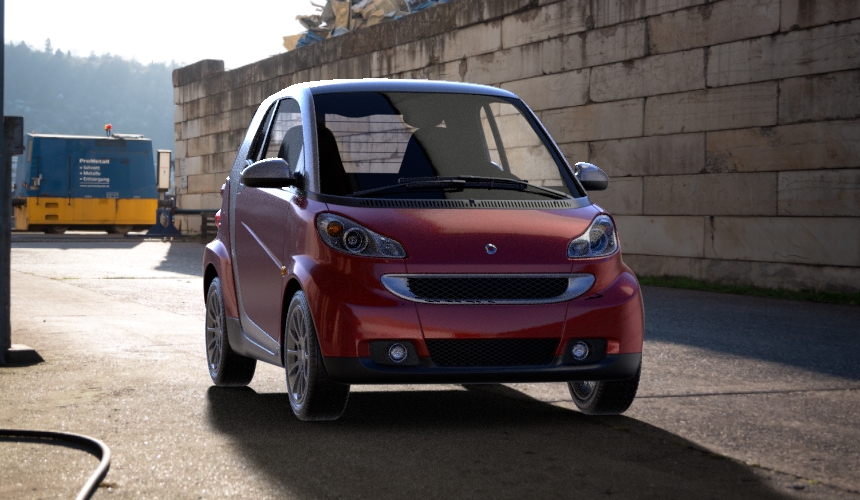
The camera background is showing a backplate image that was shot at the same location as the HDRI map we are going to load and edit.
Start HDR Light Studio, your interface should look something like this.
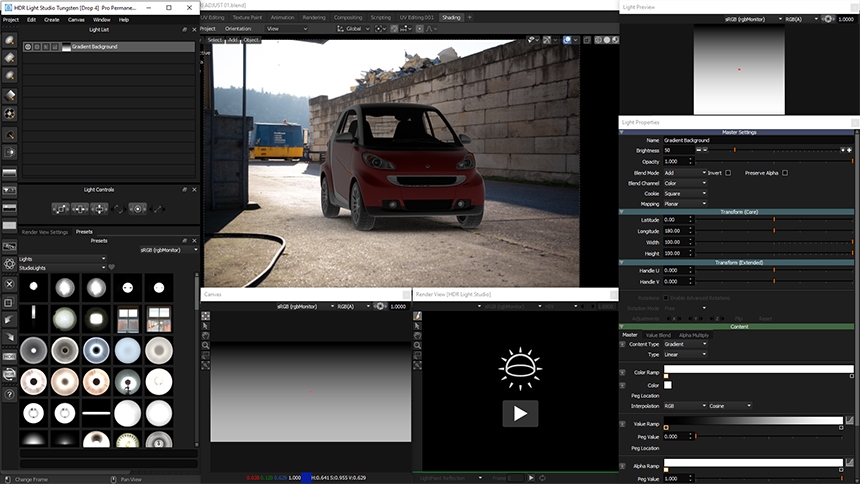
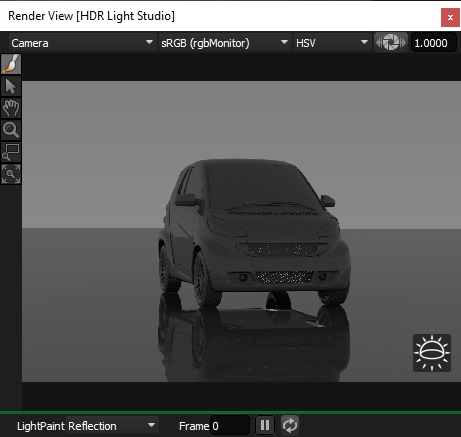
Press the play button on the Render View, then press the Import button.
The Blender scene will load into the Render View.
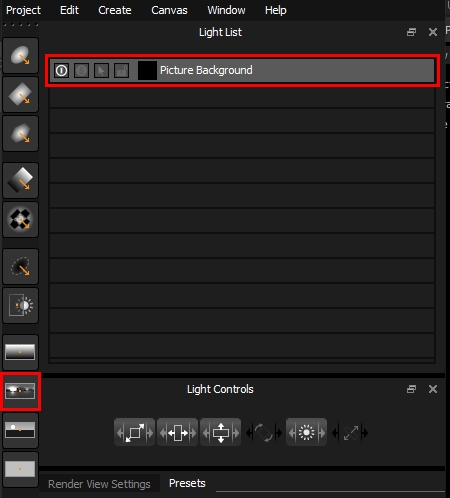
Delete the Gradient Background light.
Use the toolbar button to create a Picture Background light. We are going to load the existing HDRI map onto this light.
Download the HDRI map file here
On the Content section of the Light Properties, press the folder icon next to the Image field, to find and load the HDRI map.
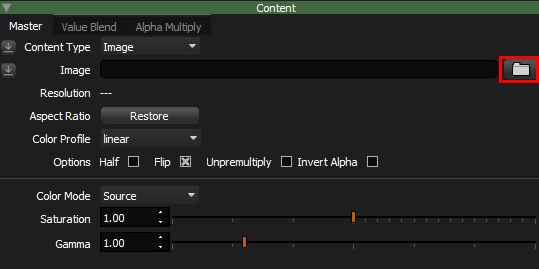
Then press Open.
A pop up panel will prompt you to convert the image. Press the Convert button.
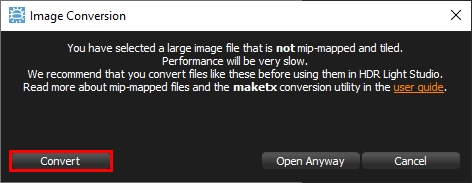
The HDRI map file will be converted to a mip-mapped and tiled version which makes it far more efficient for HDR Light Studio to work with. For example if you converted a huge HDRI map into this format, even though the conversion would take some minutes the first time, thereafter the file will load in seconds and HDR Light Studio will remain very responsive when using using it.
The file automatically has the same location and a filename with a .tx added.
Press the Save button and the conversion will begin.
Once the conversion is complete, the file is now loaded as the texture on the light.
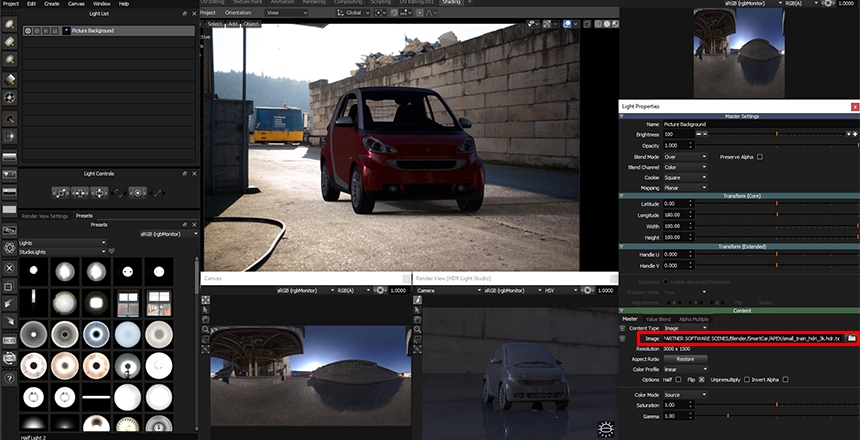
Increase the brightness of the light to to 400.
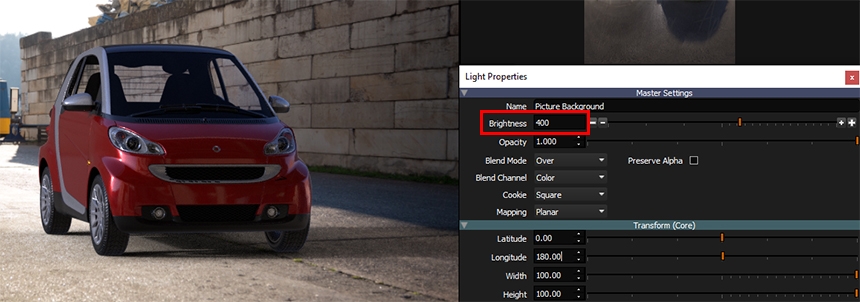
Rotate the HDRI map by adjusting the Longitude to around 86, you can see in the HDR Light Studio Render View that the blue and yellow trailer is in about the right position, and the big block wall is on the right of the shot.
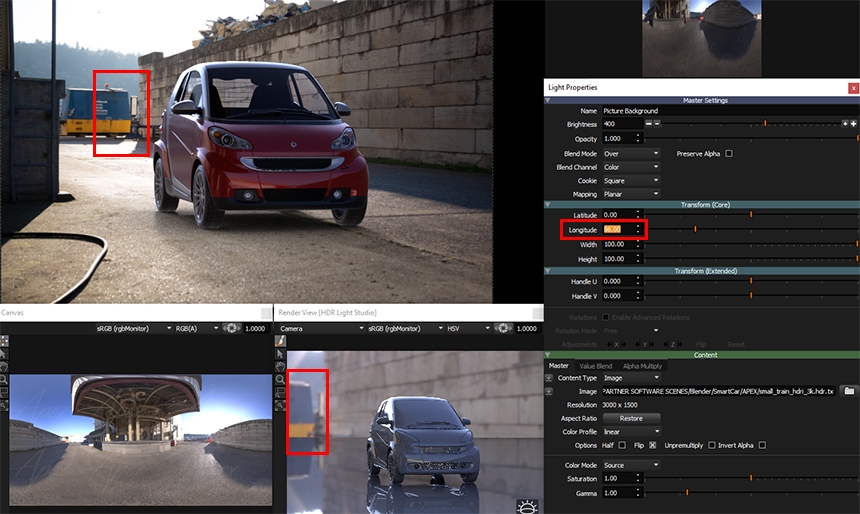
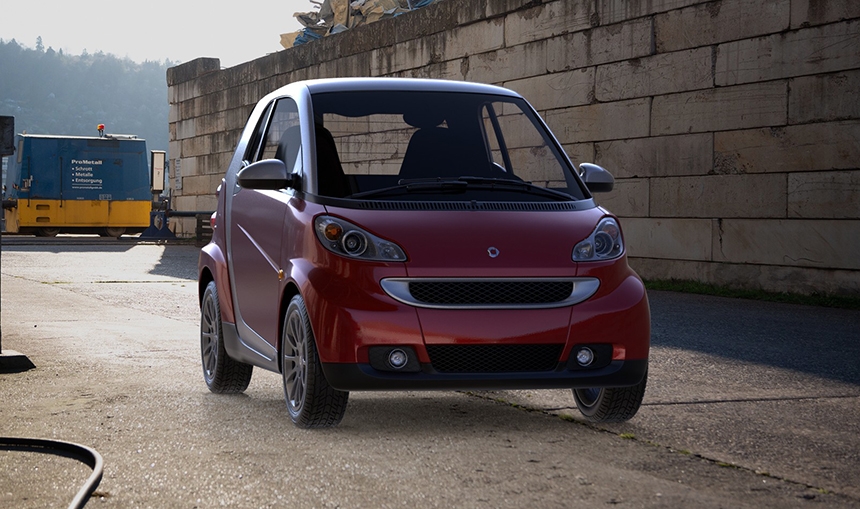
Even though the HDRI map is now lighting the shot and matches the backplate image orientation, the results are not great at the moment. We are going to use the HDRI map as a base and make some improvements to it.
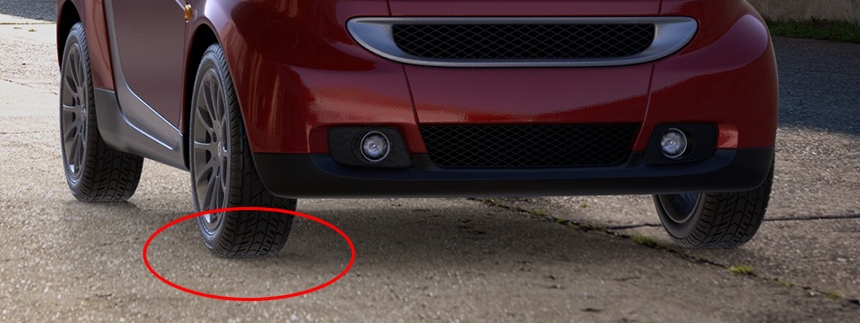
The first problem is that the HDRI map is lighting the tires too much from underneath.
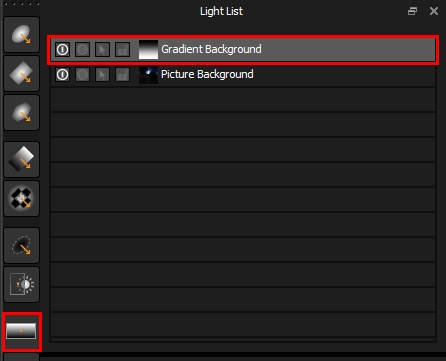
Create a Gradient Background light from the tool bar.
Change the brightness to 100 and the blend mode to Multiply.
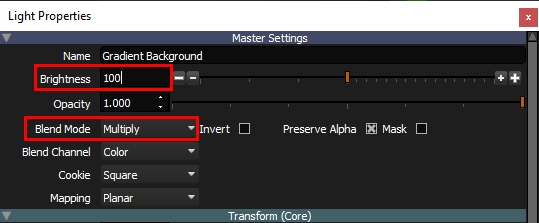
On the Value Ramp for the gradient, double click on the ramp to add 2 more pegs, and make the right side values of the ramp to to be approximately 0.1. The ramp should look like this.

This gradient, multiplied into the HDRI map, has nicely has darkened the lower part of the HDRI map and the tires look much better.
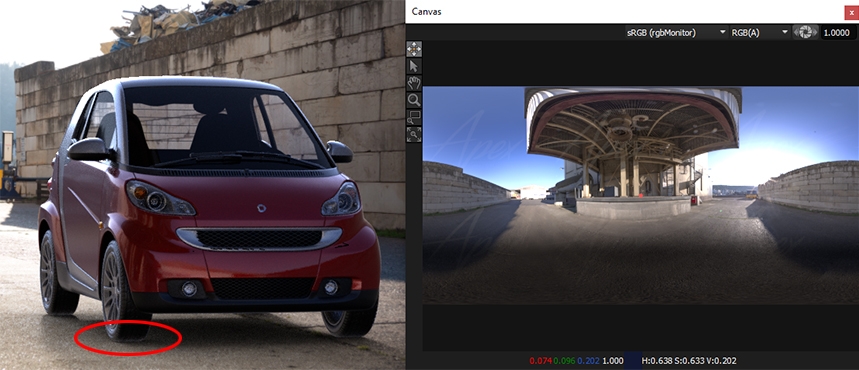
Looking at the floor shadow, it looks like an overcast day with a very soft shadow.
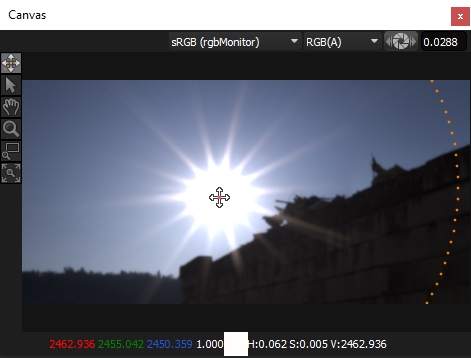
But if we explore the HDRI map on the Canvas by clicking, holding and dragging on the Exposure button, we can then see it's a clear day with a bright sun.
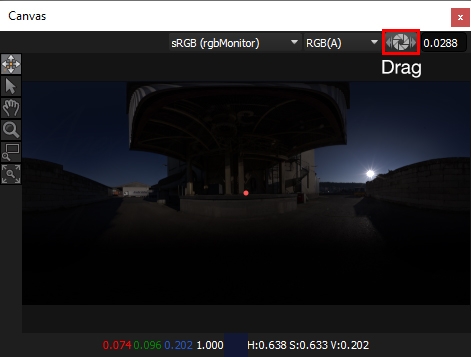
The soft shadow is caused by the sun not being bright enough on the HDRI map. It has probably been clipped when the image was photographically captured. This is a common issue and has actually been fixed on the final HDRI map Apex Automotive released.
Let's fix this issue and boost the sun brightness.
Make a Round Light from the toolbar.
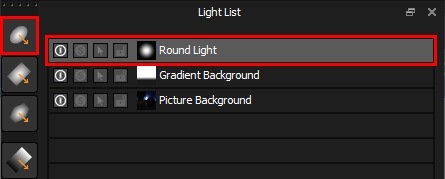
Change the blend mode to Amplify.
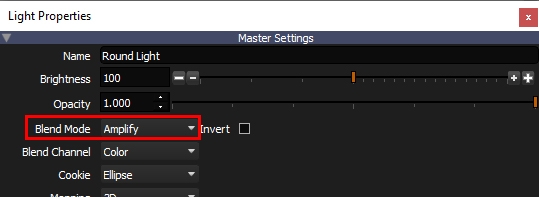
Position the light centred over the top of the sun. Zoom into the Canvas if you need to, to place it accurately.
Scale the light until it fits over the sun. 2 x 2 is a good size.
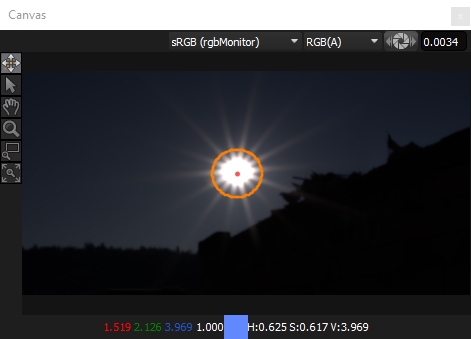
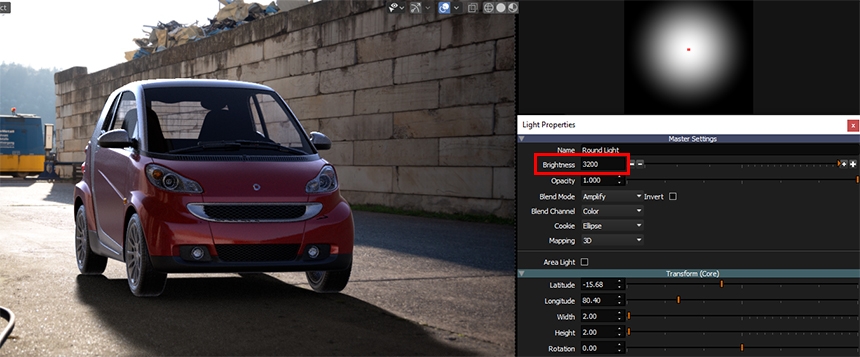
Increase the brightness of the Round Light until you feel the sun looks bright enough.
Values for lights can be higher than the end of slider. You can keep pressing the + button to increase the value.
We ended up with a value of 3,200.
You can see in the Blender render the floor shadow is now much better.
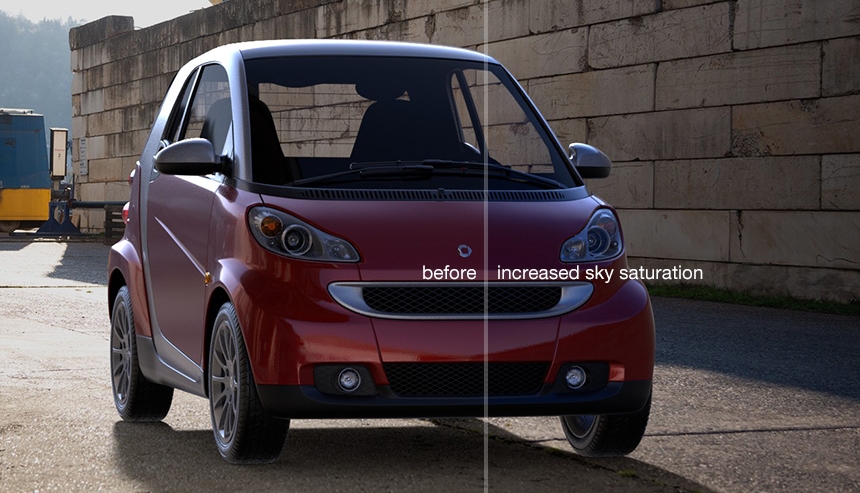
The sky in the HDRI map is nice and blue. But it's not looking very blue in the reflections in the car. Let's increase the saturation of the sky to get more blue into the car.
Make a Round Light.
Change the blend mode to Saturation.
Place the light at the top of the HDRI map.
Change the size to 400 x 400, and brightness to 25.
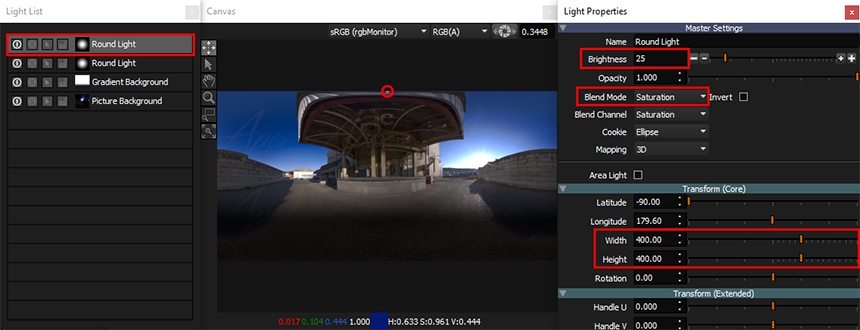
You can see the sky is now more saturated.
Now for some creative additions to the lighting, to shape the light and make the car come alive.
We can get away with adding lights because the viewer has no idea what is out of the shot. There could be additional lighting and reflections coming from the environment. As long as the car looks well integrated into the background, we can get away with creatively enhancing the lighting.
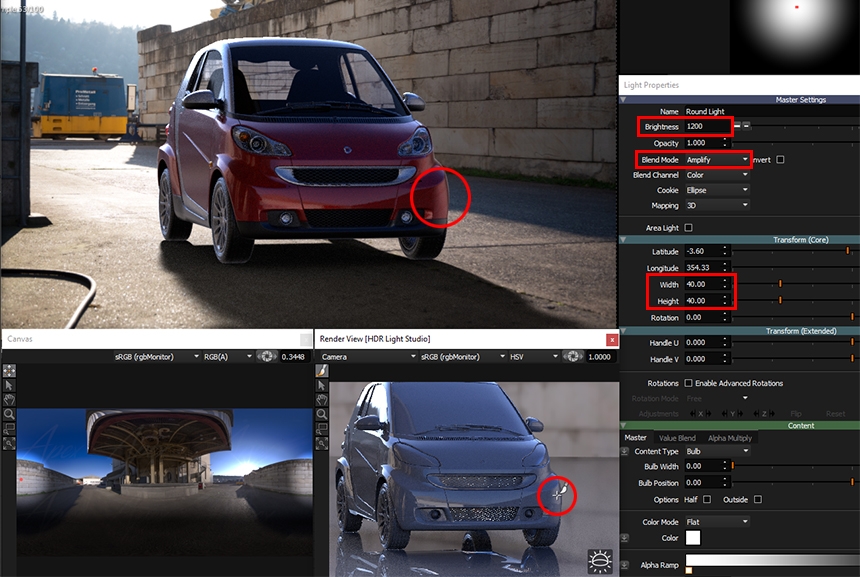
First we will add a Round Light to light the right bumper area.
Use LightPaint to place the light on the bumper.
Change the Blend mode to Amplify, brightness to 1200 and size to 40 x 40.
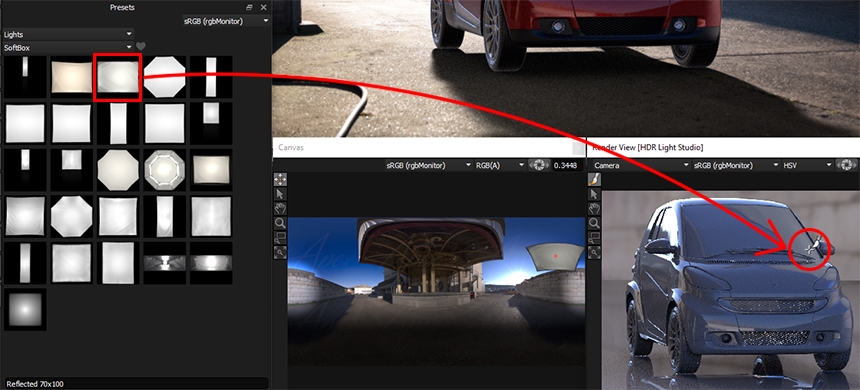
Next we are going to add a soft box over the car, like we did in the studio.
Filter the Preset lights by SoftBox, drag and drop Medium Softbox Diffused onto the right side of the windscreen.
Enable Advanced Rotation and choose Fixed rotation mode.

Increase the brightness to 400
The size looks good as it is.
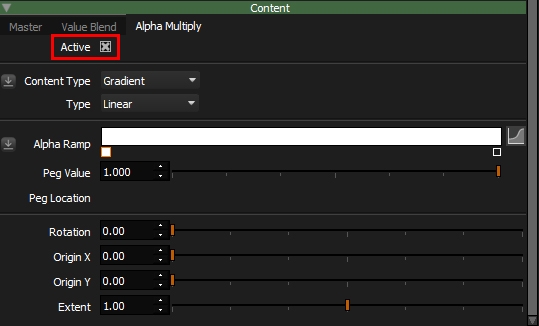
The light looks too clean, so we are going to break it up with some lines using alpha multiply.
Make Alpha Multiply active, the default linear gradient is fine for what we need.
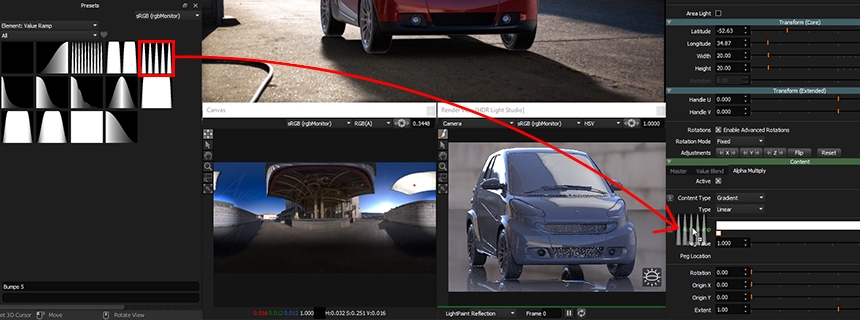
In the Preset panel, change the type from Lights to Element: Value Ramp
Drag and drop the Bumps 5 preset onto the Alpha Ramp name, which turns green as you start dragging.
Now change the Rotation value to 90 degrees.
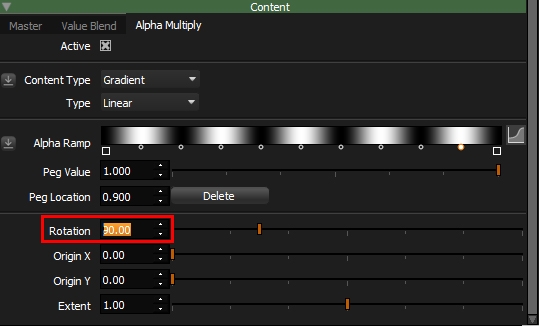
This looks good, makes the windscreen and hood look a bit more interesting.
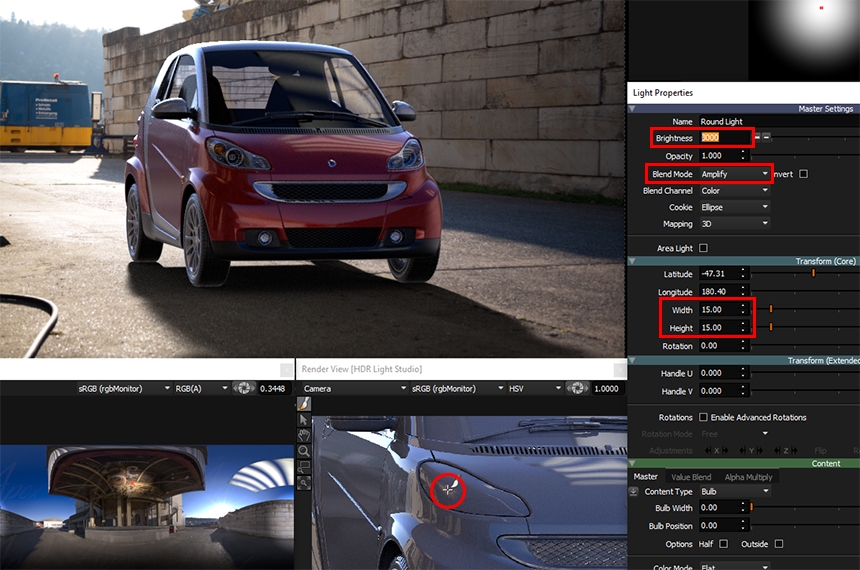
Next we will make a Round Light and place it on the left head light.
Scale it to 15 x 15 and increase the brightness to 3000. Change the blend mode to Amplify. This creates a nice set of highlights on the bumper detail.
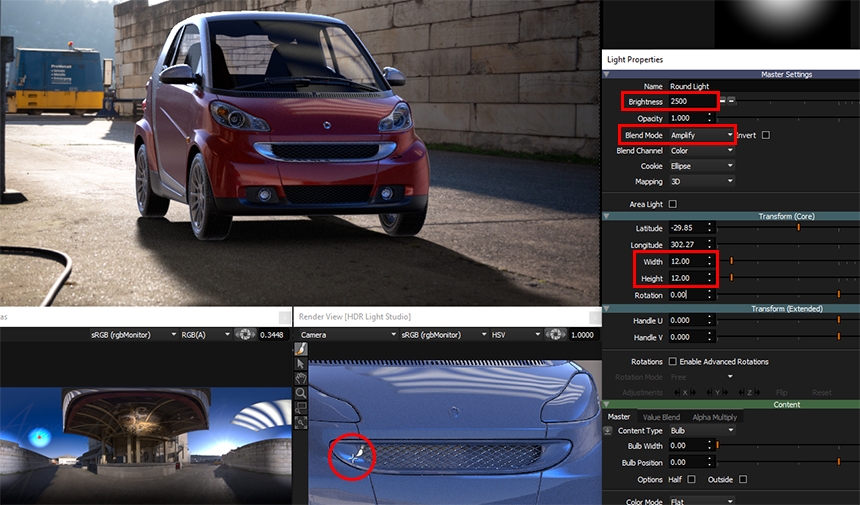
Next we will make another Round Light and position it on the grill area. Zoom into the Render View so we can place the light more easily. Increase the brightness to around 2500 and change the blend mode to Amplify. Scale the light down to 12 x 12... as it's too big.
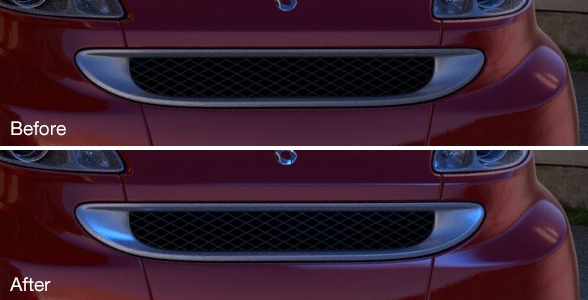
If we compare before and after you can see how this light has made a big difference.
So finally, one more Round Light. We are going to place a nice highlight on the right bumper detail too, we will scale it down to 12 x 12, change the brightness to around 2000, then finally change the blend mode to Amplify.
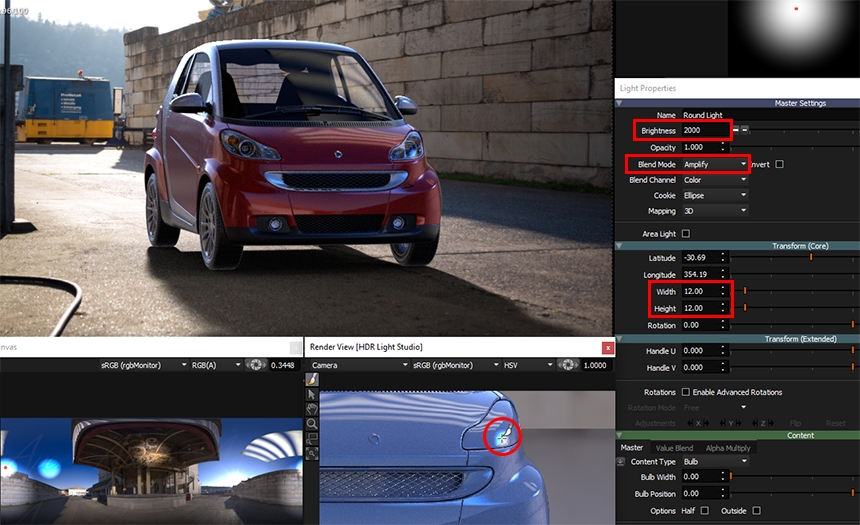
So finally, we are happy with the overall lighting... but we want to boost the brightness of all lights.
To do this we will use the trick we showed in an earlier lesson of using a Flat Background light with blend mode Multiply. Increase the brightness to 150, which will make the brightness 150%.
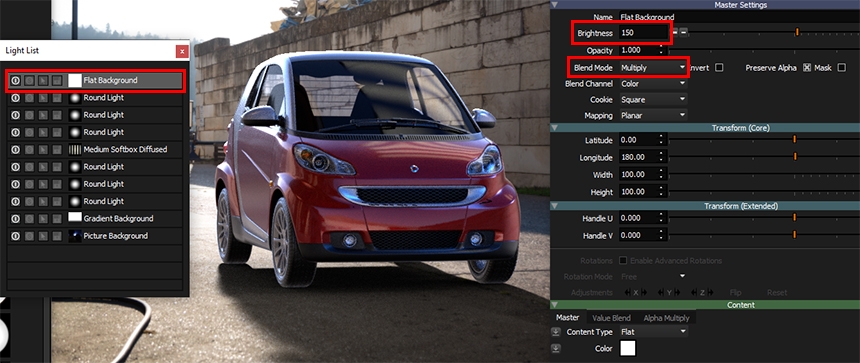
So that's it, we can solo the original HDRI map and then unsolo it, to see the difference. The overall lighting is so much better. It brings the car alive and makes the shot much more interesting.
Press the HDR button to render the final HDRI map, and close HDR Light Studio using the Stop button on the Blender interface.
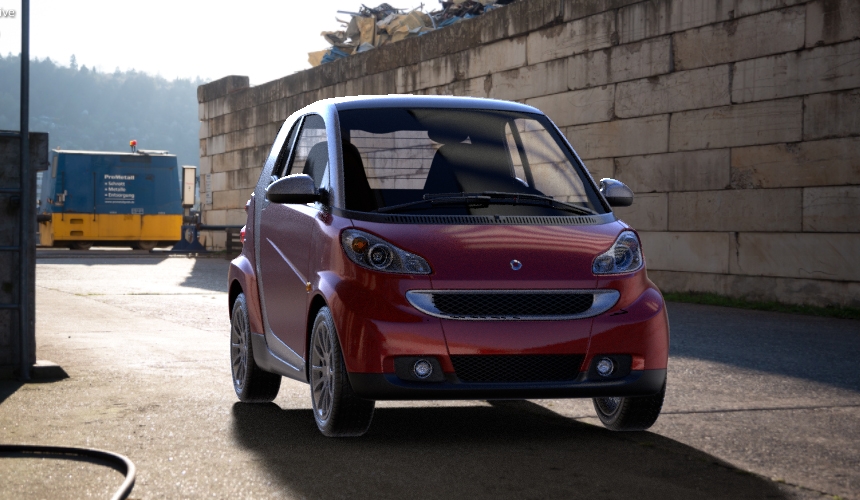
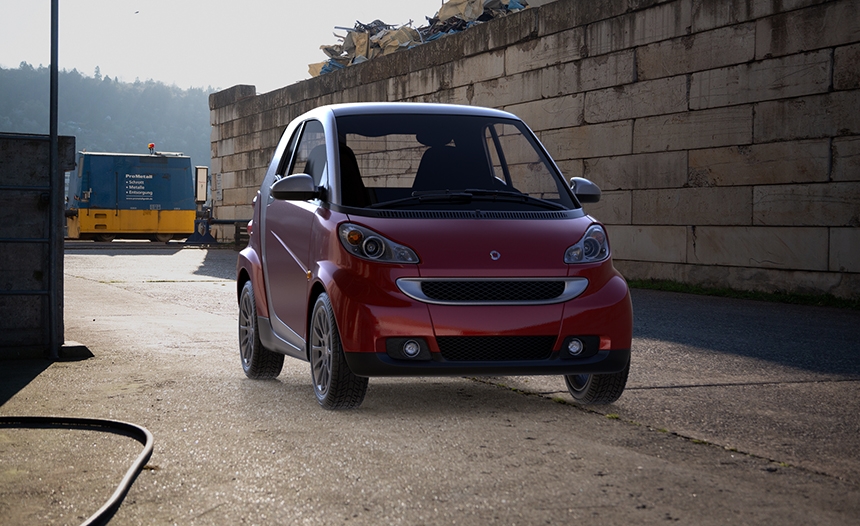
Here is the original HDRI lighting:
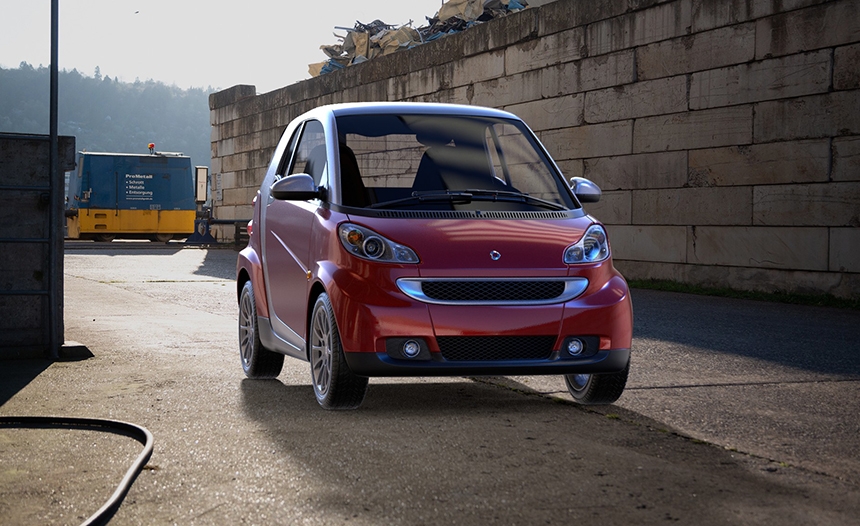
Here is the edited HDRI lighting result:
This entry was posted in Lighting Tutorials and Demos and tagged Blender.

