Cinema 4D and V-Ray Lighting Tutorial: Watch Front View
In this video, we learn how to light the front view of a watch using HDR Light Studio lighting plugin for Cinema 4D and V-Ray render. We hope watching this video will teach you new lighting techniques and inspire you creatively.
If you’d like to follow along, you can download the project file for free here.
If you are new to HDR Light Studio, we recommend watching the following videos first:
HDR Light Studio - Quick Start and Cinema 4D Connection - Quick Start
Level: Beginner
HDR Light Studio Version Used: Xenon Drop 3 (Build: 2021.0520)
Software used: HDR Light Studio (standalone/main app & connection) + Cinema 4D + V-Ray Render
This official HDR Light Studio tutorial covers:
- Finding References
- Creating a Gradient Background Light
- Creating a Rim Light to act as a Background
- Adjusting the Gradient Background Light
- Adding Highlights to the Straps
- Creating a Light Blocker to Remove Unwanted Reflections
- Adding Depth to the Face/Dial
- Adding Highlights on the Crown and Pushers
- Rendering the Final HDRI Map
1. Finding References
Timestamp: @0:14
The first step in approaching any lighting project is to gather references for the ambience and style of lighting. If the picture of what you want to achieve is clear in your head, it is going to be a lot easier and quicker to light your 3D scene. What’s unique about HDR Light Studio is that it does a fantastic job at transforming your imagination into a 3D lighting setup in your 3D software.
In this tutorial, the kind of look we’re going for is something like this:
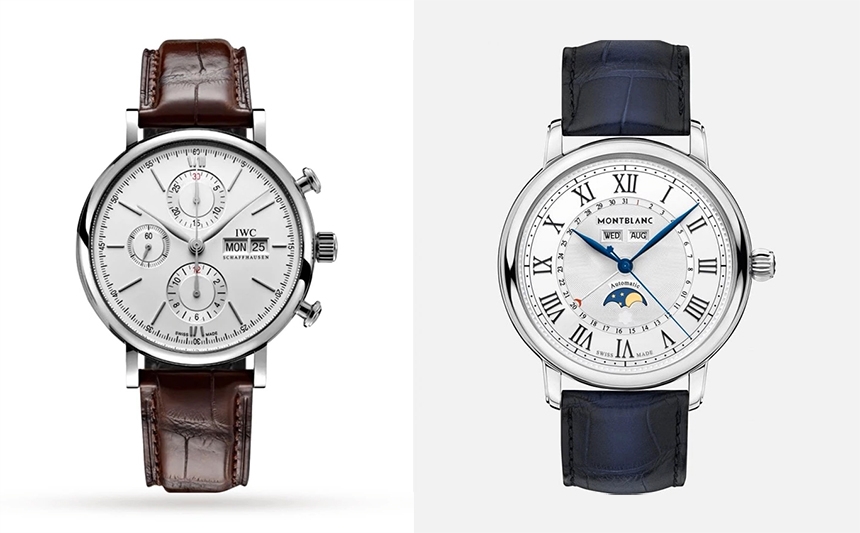
What both of these watches have in common are what appears to be two large panels reflecting in the front. There’s also a noticeable black line showing on the watch’s case, where the two panels don’t meet, and a highlight on the strap at the top and bottom.
2. Creating a Gradient Background Light
Timestamp: @2:31
When we start HDR Light Studio connection from Cinema 4D, by default the scene will be lit with the Default Gradient Background. This is so that we can see our scene because if we had no lights on startup, our render would be fully black.
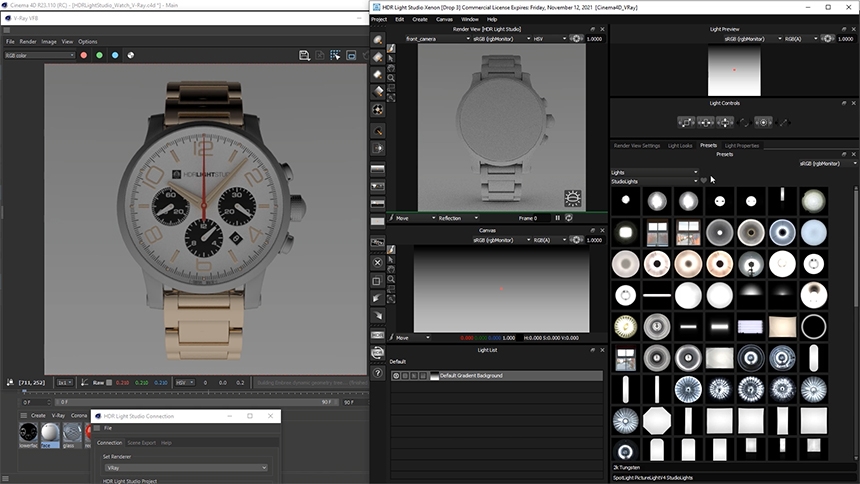
To have something similar to the large panels reflected in the watch's case (as seen in reference images), we can use the Default Gradient Background but tweak the gradients using the value ramp.
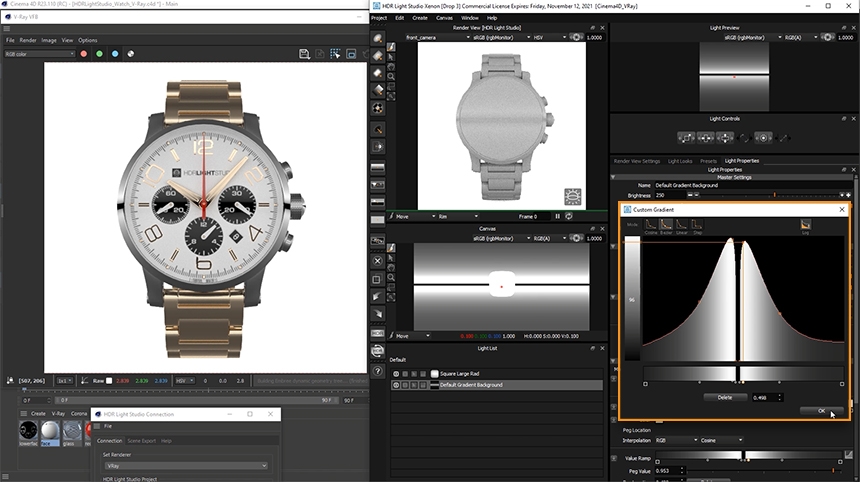
In the image below we can see the graph for the gradient in its default state. At the moment, it uses a cosine interpolation and it’s setting the Gradient Background to gradually transition from black to white.
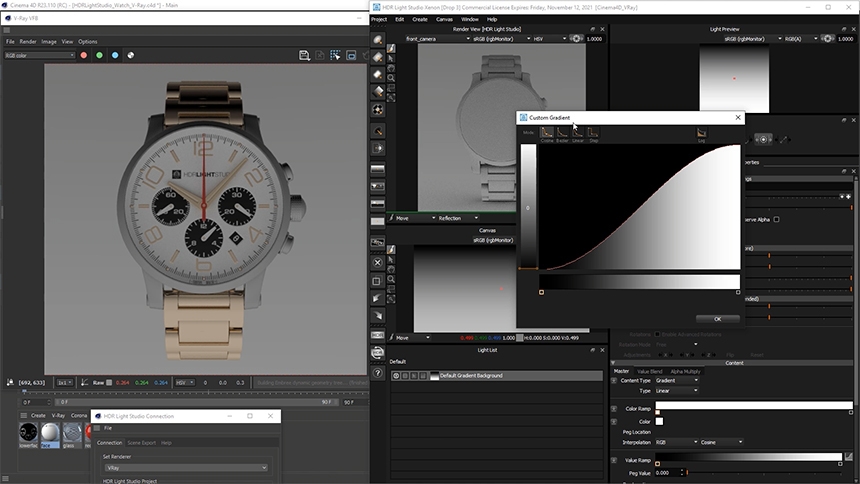
After some quick tweaking and making the gradient background brighter, we were able to achieve something like this:
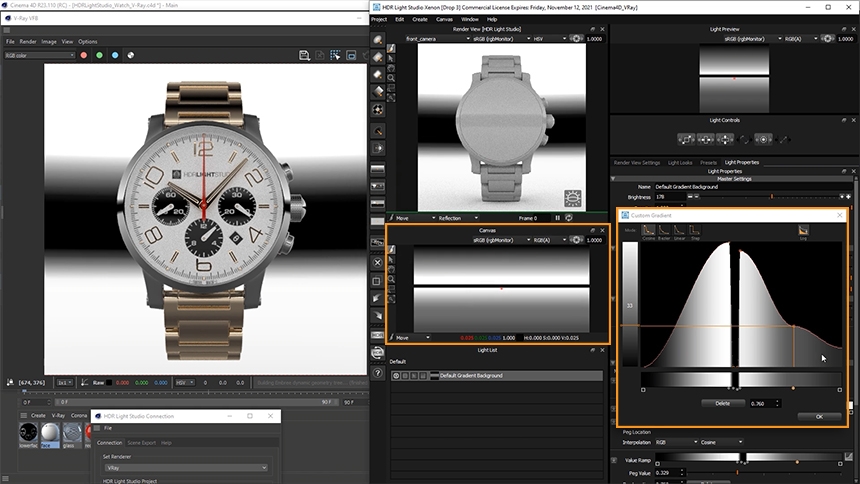
The gradient graph has been set up in a way that replicates the effect of having two large light panels, one at the bottom and one at the top.
The canvas panel has sRGB LUT applied to it by default. This allows for a correct HDRI map preview on our displays. However, this means that all of the darker values in our gradient graph have been pulled up. So, what we do on the gradient graph is not necessarily a true representation of what is coming through and what we can see. To address this, the Log button has been turned on to put a logarithmic scale against the values in the gradient graph – reversing the effects of the sRGB LUT.
3. Creating a Rim Light to act as a Background
Timestamp: @5:53
Before any further editing is done on the gradient background light, let’s create a plain white rim light that will act as a background. Looking at the watch on a plain white background will make it easier to see it in its true lighting.
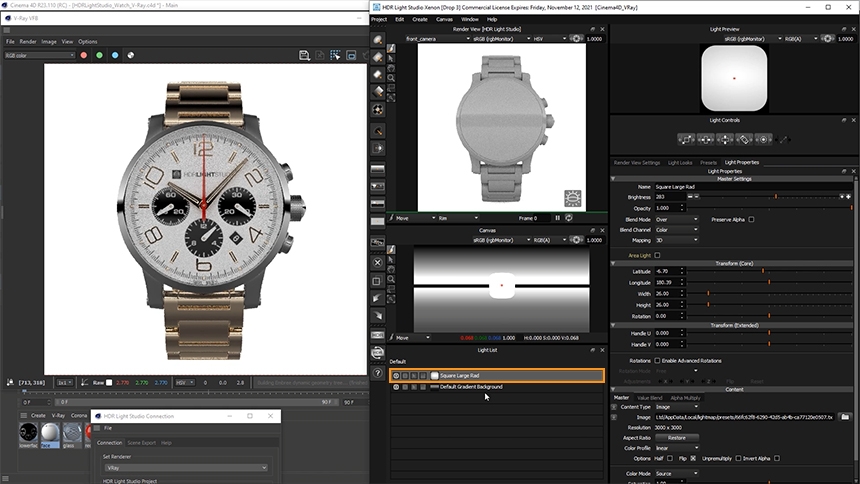
HDR Light Studio’s Rim LightPaint mode always comes in handy for placing lights behind the subject.
4. Adjusting the Gradient Background Light
Timestamp: @6:48
Changing the watch’s background revealed the need to make the gradient background light brighter and further adjust the gradient graph. To achieve smoother graduation points, the interpolation has been changed to Bezier.
5. Adding Highlights to the Straps
Timestamp: @8:41
For the highlights on the straps, we wanted something soft with nice graduation. A round soft light was used as a starting point. After making the light bigger and brighter, we focused on finding the sweet spot for it on one of the straps. HDR Light Studio’s Reflective LightPaint mode allowed us to click and drag on the bottom strap in HDR Light Studio’s Render View to paint the highlight position exactly where needed.
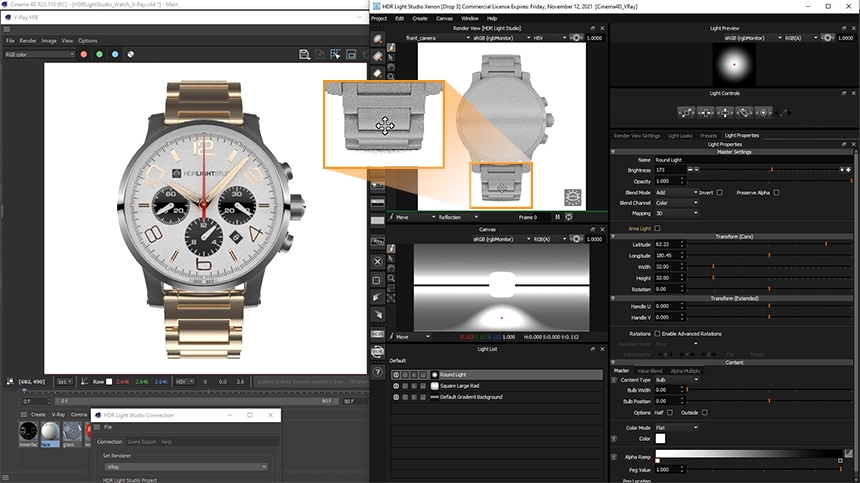
The Log button has been turned on for this light to change the falloff and make the light brighter in the center.
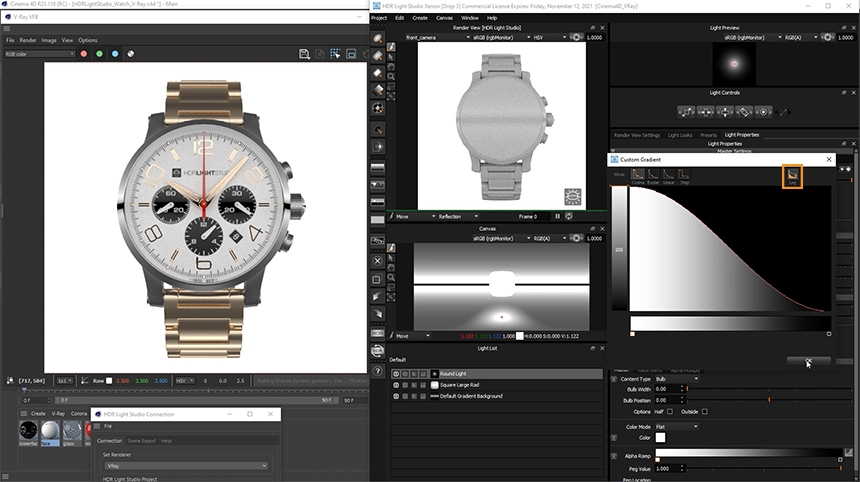
With the Log applied, we felt like the light could be slightly bigger, but dimmer, and moved minimally higher up the strap.
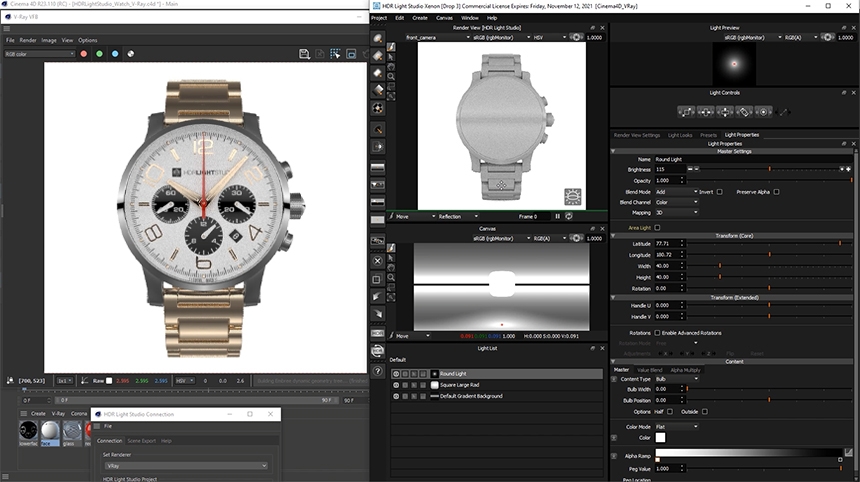
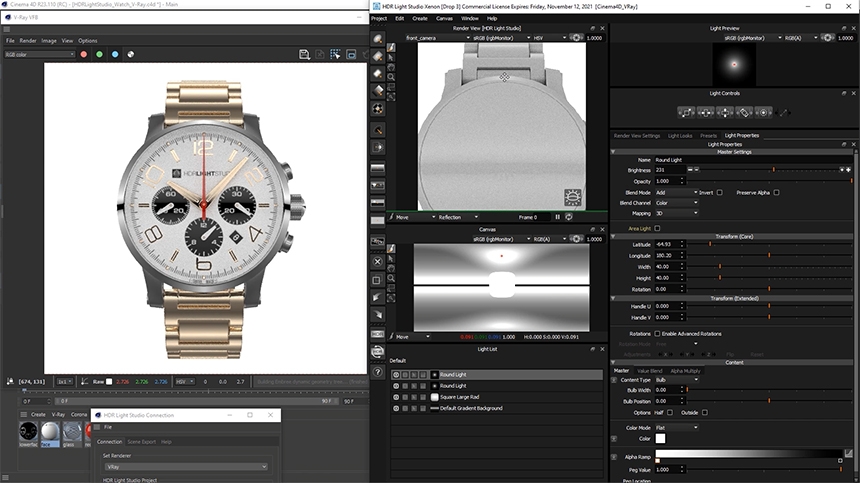
Now that we’re happy with our light’s appearance, we can duplicate it and use LightPaint to find a sweet spot for our second highlight. This time on the top strap. Making the top highlight brighter than the bottom one added more depth to our shot.
6. Creating a Light Blocker to Remove Unwanted Reflections
Timestamp: @11:11
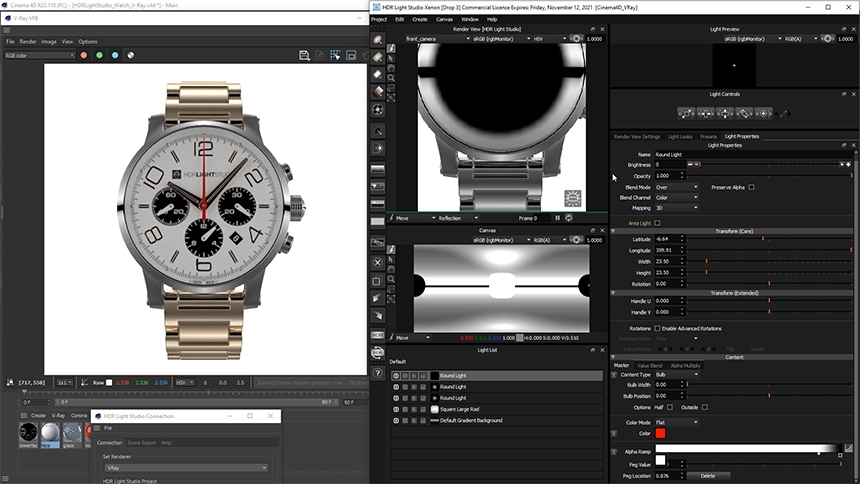
We don’t like the black line going through the middle of the face.
So, let’s work on removing reflections on the face of a watch. What we can do is create a round light with the blend mode set to ‘Over’ to reflect on the face and make the brightness 0 – this will make the light black, and allow us to use it as a light blocker. We wanted our light blocker to have somewhat hard edges, so we had to play with the gradient graph/value ramp to change the falloff.
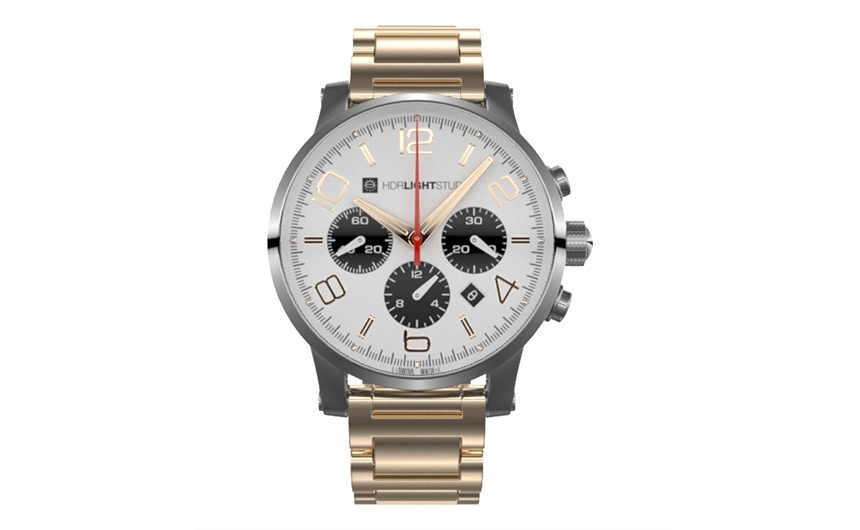
This is what the watch looks like after it had reflections removed on the face.
7. Adding Depth to the Face/Dial
Timestamp: @12:57
After removing unwanted reflections on the face using a light blocker, we now have a clean canvas that we can work with to add more depth and life to it.
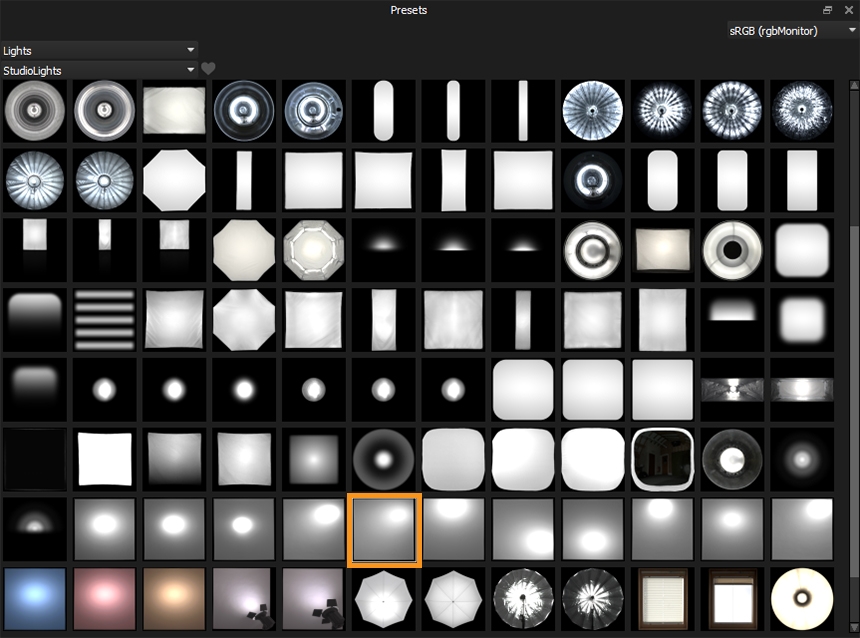
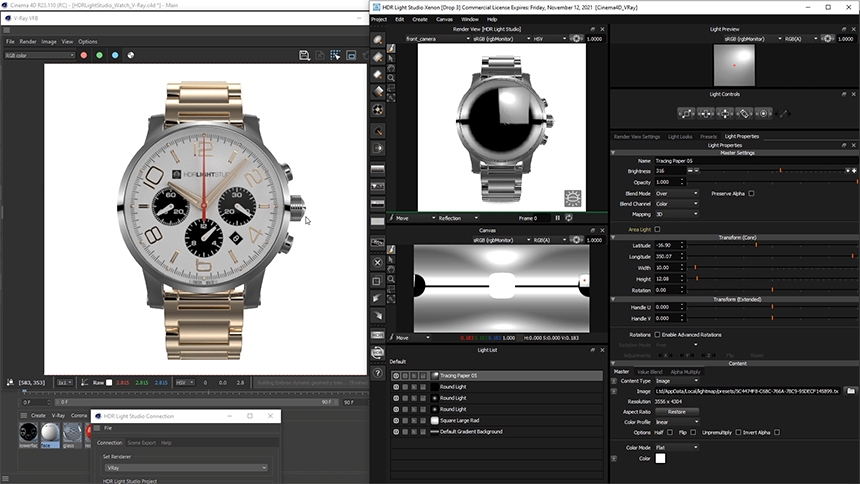
For photo-realistic results, we’ll need a light with character for this. In the presets panel, we have a large selection of HDR lighting content that we can work with. We’ve chosen one of the Tracing Paper lights as it has a tonne of details – from creases to hotspots.
Again, we’ve used LightPaint to position the reflection where we wanted without guessing.
After editing the brightness and the size of the light, here’s what we have achieved:
8. Adding Highlights on the Crown and Pushers
Timestamp: @14:46
It’d be nice to make the crown and pushers pop more by adding a highlight. So, let’s pick one of the softbox lights from the presets panel, then drag and drop it on the side of the crown.
If we solo the light to see how that affects other parts of the watch, we can see that it lights some of the bezel and lugs.
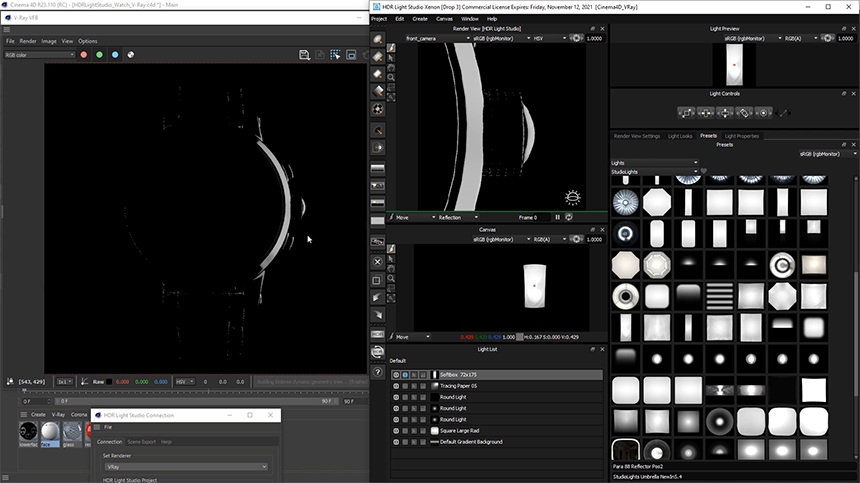
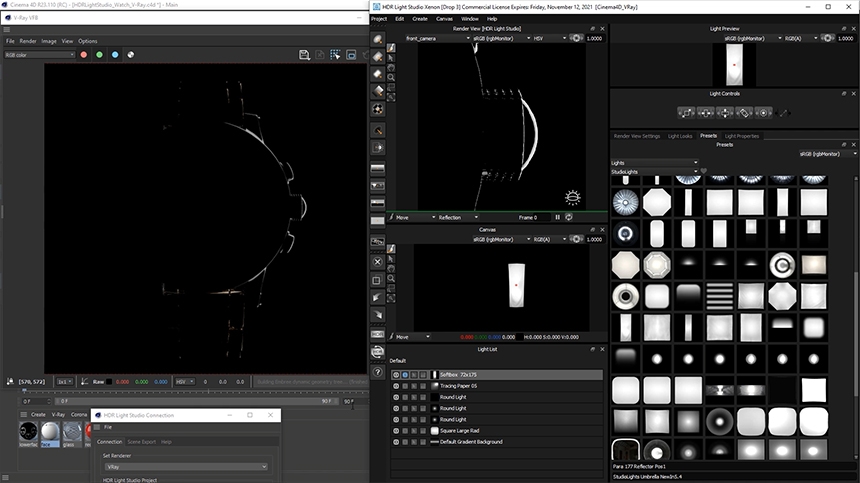
To fix this, we can scale the width of the light to make it narrower and use LightPaint to reposition it slightly.
9. Rendering the Final HDRI Map
Timestamp: @16:02
Here is our final lighting design for our watch front view:
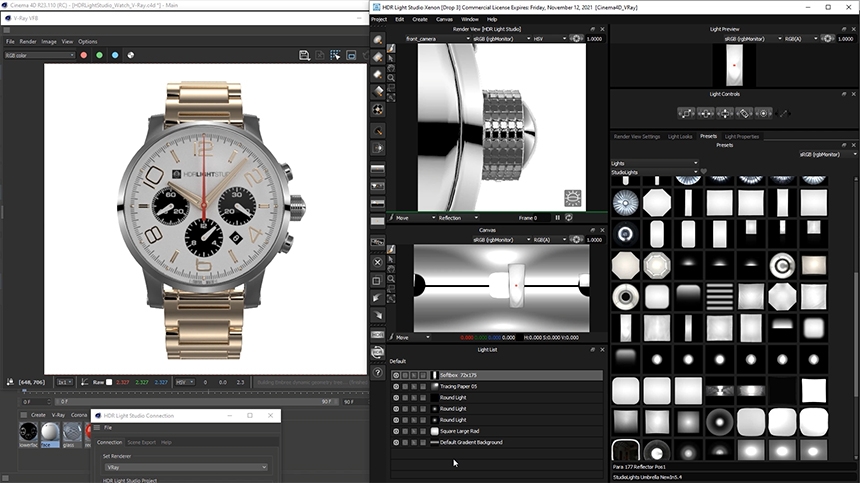
At the moment, our Cinema 4D scene is lit using a temporary low-resolution HDRI Map coming from HDR Light Studio. To finish off, let’s render out the high-resolution HDRI Map and save our Cinema 4D scene.
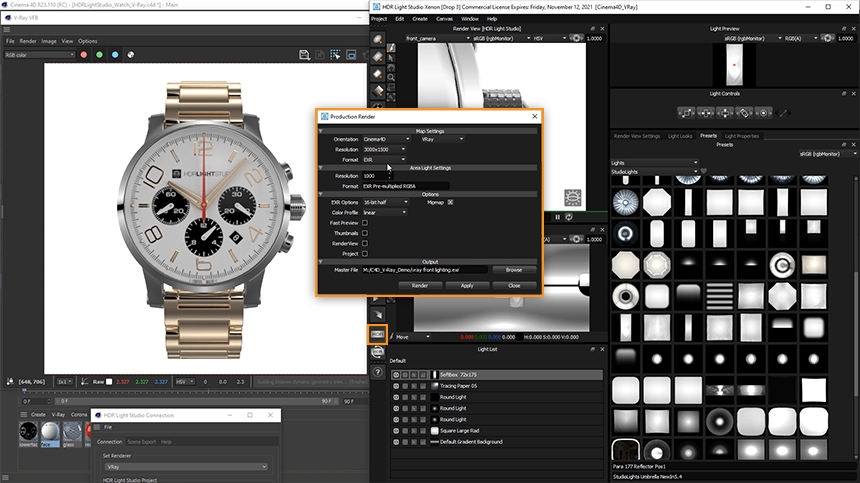
HDR Light Studio has made standard lighting for your Cinema 4D. You do not need a license for rendering the scene. The only time a license is needed is when users are authoring/building the lighting. Once the lighting is rendered and saved, it’s a standard scene that can be rendered on any machine without a HDR Light Studio license.
This entry was posted in Lighting Tutorials and Demos and tagged Cinema 4D, V-Ray.

