How do you make an HDRI Map?

This article describes a wide variety of ways to make your own HDRI maps. The main reason anyone would want to create an HDRI map is to use it for image-based lighting of 3D computer graphics. This article is written with that assumption in mind.
The scope of this article
This article will not teach how to make accurate HDRI maps in great depth. This article will make you aware of all the various methods and gear available for making HDRI maps so that you can choose the right technique to fit your needs. We will reference articles on other websites that go into far greater depth on each specific method where possible.
OK, so let's explore different ways you can make your own HDRI maps.
Key to this article
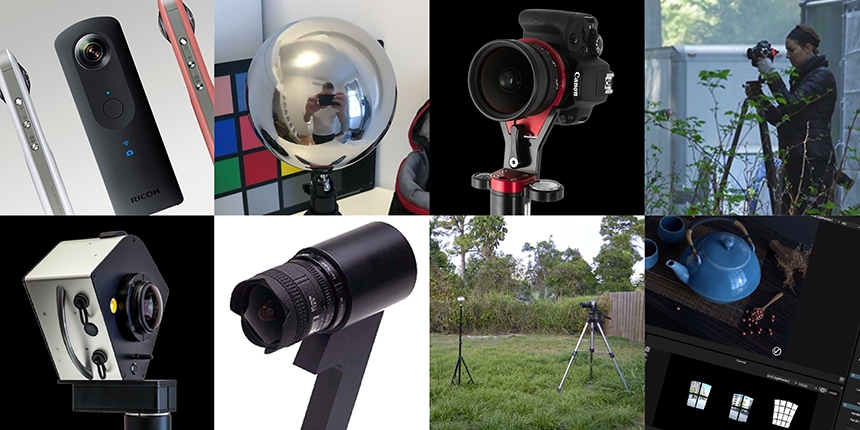
Ways to make your own HDRI maps:
- Use a specialist 360-degree HDR camera (Spheron, Civetta)
- Motorized camera head for a DSLR camera (LizardQ)
- General purpose 360-degree camera (Theta)
- Using a DSLR camera with a Panohead
- Shoot a chrome ball
- Render a HDRI map of a scene in your 3D software
- Create a HDRI map with HDR Light Studio software
Make your own HDRI map method 1:
Use a specialist 360-degree HDR camera
There are enough people and businesses in the world that want to easily and quickly capture 360-degree HDR images of real-life locations that a small number of companies have developed specialist camera systems dedicated to this task.
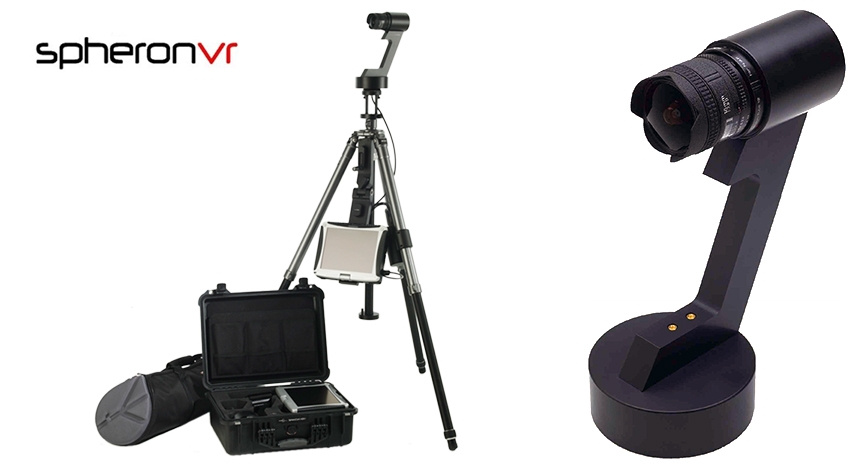
Spheron - SPHEROCAM HDR
Spheron, I believe, was the first company to create a dedicated HDR camera system and they dominated the 360 HDR camera market for a few years.
The SPHEROCAM HDR camera is mounted onto the top of a tripod and is tethered to a rugged laptop computer. Software on the laptop controls the camera and the operator starts the scan process via the laptop. The camera slowly rotates on the top of the fixed tripod capturing vertical scanlines that build up to complete the HDRI map.
Scan times are quoted as starting at from 20 seconds, but in reality, for a higher resolution image suitable for decent reflections in computer graphics, it can take many minutes for a full scan. So on a cloudy day, where the wind is blowing the clouds and the light levels are changing, this can lead to less than perfect results with some banding in the final HDRI. This is compensated for in the software to some extent.
The Spheron is a very easy-to-use solution. When you get back to the studio with the images, they are ready to use straight away. There is no stitching and post-processing to do.
Technical Information
Max Dynamic Range: 26 stops
Scan time: From 20 seconds for low resolution, up to many minutes for higher
Max Resolution: 10,600 x 5300 pixels
Cost: 29,900 euros
Pros
- Very easy to use
- Makes HDRI maps, with no stitching required after the shoot.
Cons
- Slow scan times make it most suitable for static environments/conditions
- Price makes it suitable for high-end applications only
You can find out more about Spheron HDR cameras at their web site: www.spheron.com
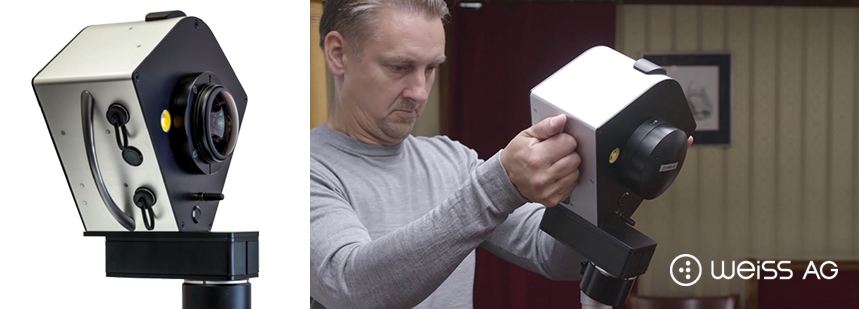
Weiss AG - Civetta 360° camera
This camera system can scan a 230 megapixel HDRI maps in just 40 seconds. The capture is started using a remote switch that uses a Bluetooth connection to the Civetta. When the capture session is complete the Civetta is connected to PC/Laptop which houses download and processing applications. The image data is then processed into the full HDRI maps. It has 256 GB of storage suitable for 800 full spherical HDR images.
Technical Information
Max Dynamic Range: 26 stops (can be extended up to 50)
Scan time: From 40 seconds for a 230 MPixel image
Max Resolution: approx 21,500 x 10,750 pixels (230 mega pixels)
Cost: Around 25,000 euros, including training.
Pros
- One-click easy of use
- Pretty fast scan time
Cons
- Price makes it suitable for high-end applications only
You can find out more about the Civetta camera at their website: www.weiss-ag.com/civetta360camera
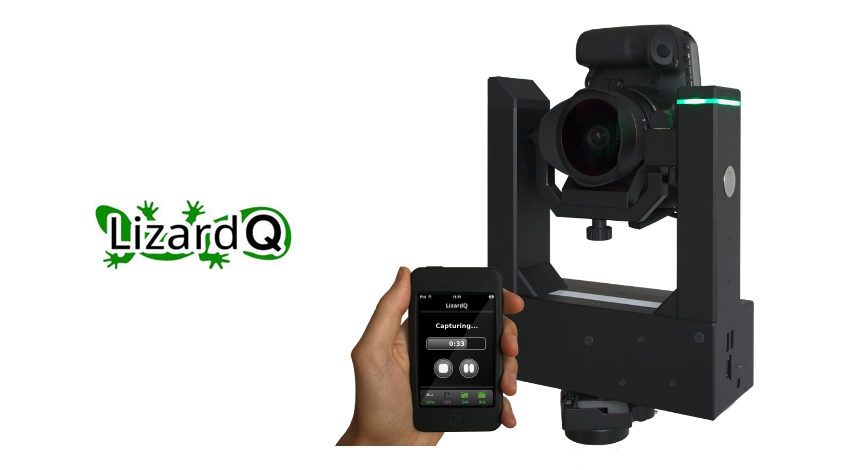
LizardQ
LizardQ is a motorized camera head onto which you attach a DSLR camera with a fisheye lens. Compatible cameras as of today are the following Canon EOS full frame bodies: 5D Mark IV, 5Ds, 5DsR, as well as the older 5D Mark II, 5D Mark III and 6D.
The system is fully automated, so with a single button press, either on the unit itself or from the remote control, you start the capture process. The camera then points in 6 directions and takes multiple photos in each direction with various exposures. After the capture process, these images then need to be copied onto your computer and stitched together with the included software to make the final HDRI maps.
Capture times can be as little as 15 seconds, with images up to 500 megapixels with up to 30 f-stops of dynamic range. These are very impressive stats making it a really powerful system for those wanting a fast capture time and very high-resolution HDRI maps.
Technical Information
Max Dynamic Range: 26 stops (can be extended up to 50)
Scan time: From 15 seconds for a 200 megapixel image
Max Resolution: 31800 x 15900 pixels
Cost: Up to 24,900 euros for a 500 megapixel solution including Zeiss 18mm lens + Canon EOS 5Ds
Pros
- Amazingly quality hi-res HDRI maps with huge dynamic range
- Fast capture time
Cons
- Price makes it suitable for high-end applications only
You can find out more about the LizardQ system at their website: www.lizardq.com
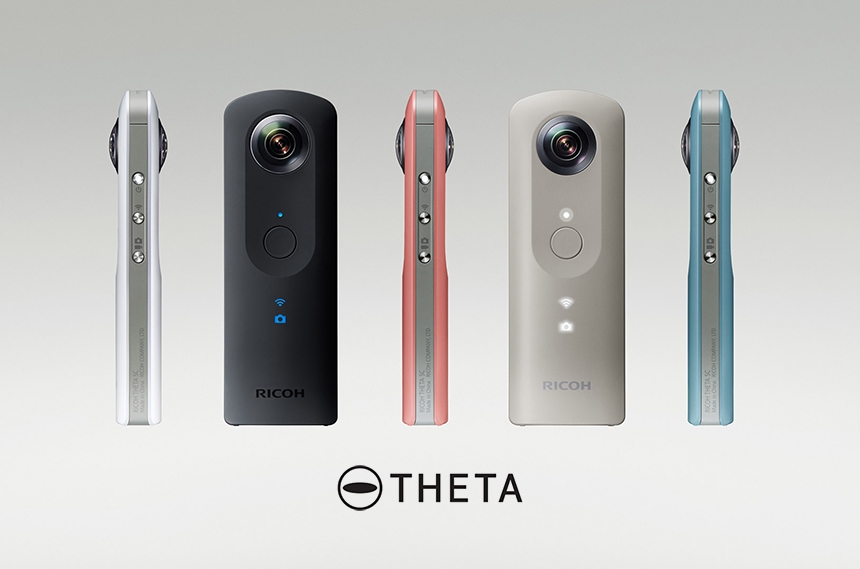
Ricoh Theta
The Ricoh Theta is a range of cameras created for taking 360-degree still images and videos. The Thetas have not been created for HDR creation professionals. However, they have gained quite a following as a great device for making medium-resolution HDRI maps - due to their compact size, small enough for even a pocket and to capture an HDRI map from an awkward location, and their relatively low price.
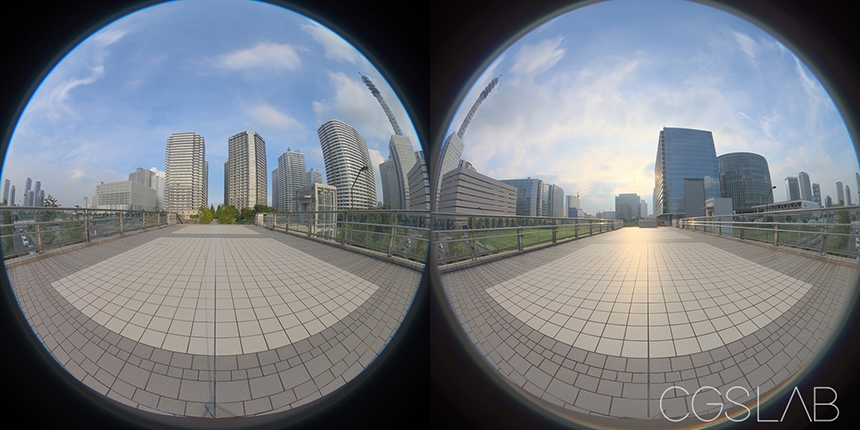
The Theta works by taking 2 fisheye shots with cameras on opposite sides of the unit.
So far it seems perfect. But from here there seems to be quite a choice of different ways to proceed in the HDRI map capture process. Firstly, we need a way to tell the camera to take a sequence of differently exposed images that can then be combined later into an HDRI. There appear to be 2 routes for this.
1. Plug-ins are available to install for some Theta models. The leading plug-in for this seems to be Authydra, but there are others.
2. There are also several apps you can install on your phone to control the Theta and make it take a sequence of exposures.
So assuming you have used one of the methods above, the next step is to download the images onto your computer, change them into a lat-long format and merge the bracketed shots into an HDRI map.
Again there is a choice of software that can be used for this. The Theta includes software to convert the double fisheye lens images into a lat-long format image. You can choose which software to use to merge the shots into an HDRI map. There are many videos and articles online about the whole process of making an HDRI map with a Theta camera.
Technical Information
Max Dynamic Range: Depends on how many bracketed shots you take
Scan time: Just a few seconds
Max Resolution: Cameras models produce images from 5376x2688 pixels up to 11008 x 5504 pixels max.
Cost: Models from £300 up to £1,200
Pros
- Relatively low cost
- Very fast capture time with automated brackets shots via 3rd party software
- Very compact - easy to take with you and set up quickly and easily on-set and in awkward locations.
Cons
- The process could be far slicker to make the HDRI map. It would be great to see an end-to-end solution appear for making HDRI maps with a Theta - that controls the capture and post-processing to arrive at the final HDRI maps. As it stands there is a wide choice of software to help with this. But there are many steps to jump through using multiple apps.
Useful Websites and Content:
Ricoh Theta Official Website
Video: How To Batch Stitch Ricoh Theta Z1 HDRIs out of PT GUI
Tutorial Article: Create High Quality HDRI for VFX using RICOH THETA Z1

This is by far the most popular way to make your own high-quality HDRI map. By mounting a good quality DSLR camera with a very wide-angle or fisheye lens onto a nodal panoramic head, the camera can be quickly positioned to take bracketed exposures in various directions for post-processing into an HDRI map. The panohead will ensure the camera is pivoting from exactly the right location and will also make it easy to index the camera to point in the correct directions to cover the whole of the 360 scene with a good overlap between shots. 360precision makes some of the best precision panoramic tripod heads that are perfect for this.
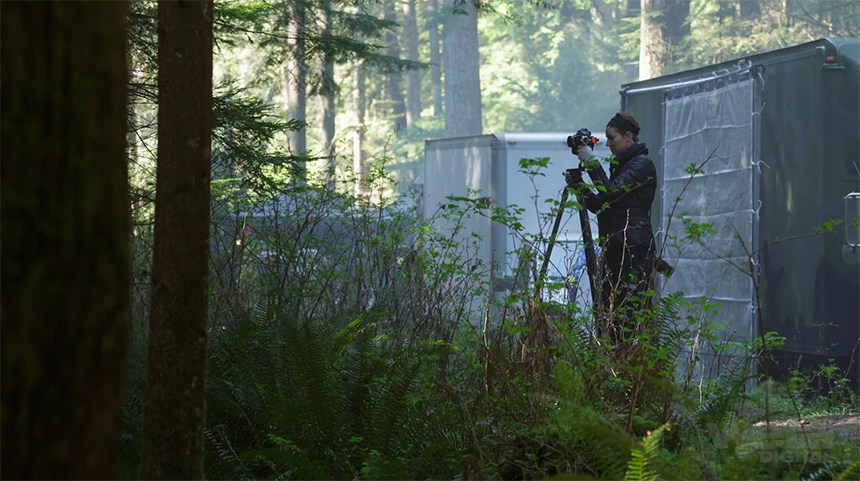
In the video from Weta (link provided below), they recommend using a Canon full-frame camera (like a 5D), with an 8mm fisheye lens, that is capable of 7 bracketed shots with 2 stop increments to capture a full dynamic range. They use a panohead with 3 indents that locate the camera every 120 degrees turning horizontally. They also tilt the camera back around 7.5 degrees to ensure an overlap on the photo coverage at the top of the environment where lighting is more likely to be, as the tripod is at the bottom of the scene and will need painting out anyway.
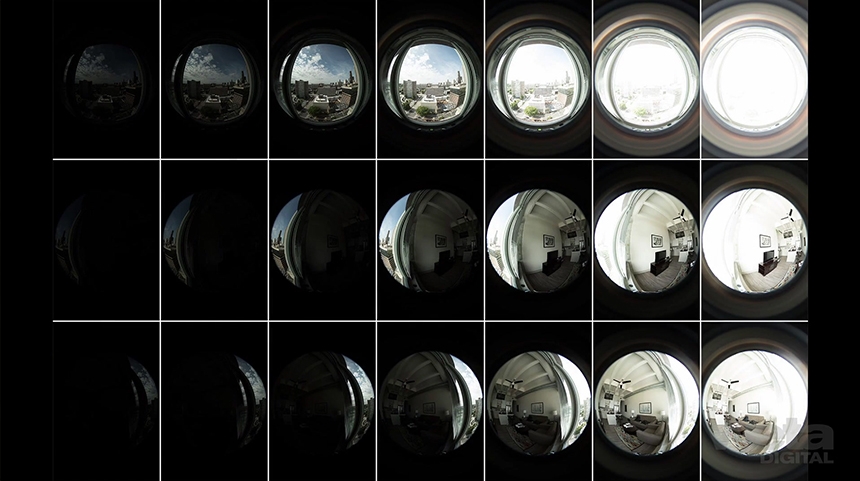
The photographs stored on the camera are then downloaded to a computer and processed. The bracketed image sets are merged into high dynamic range images. Then the HDRI images from each viewing angle are stitched together seamlessly into a lat-long format HDRI map.
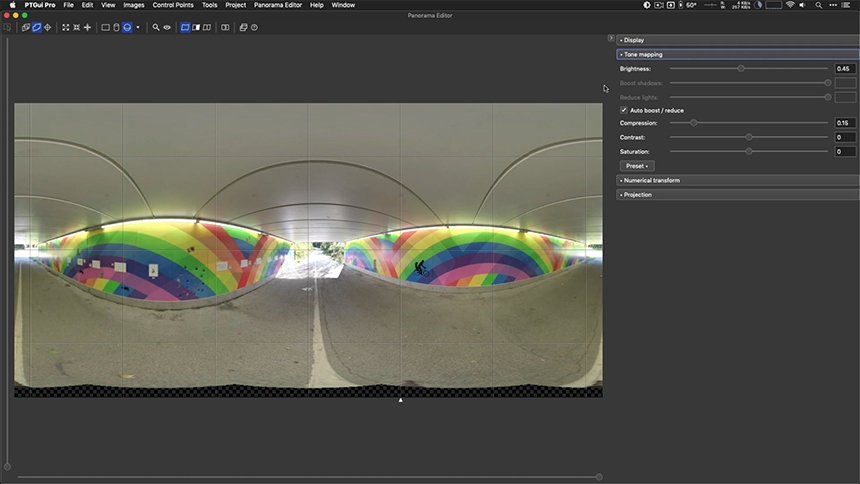
The most used software for achieving this is called PTGUI - you can find out more about it here. You can use it to process the shots from the camera and turn them into an HDRI map.
I imagine most commercially available HDRI maps have been created using this method with a DSLR. It uses off-the-shelf hardware that can also be used for shooting background plates to go with the HDRI map. The only real additional cost is buying the panohead.
Technical Information:
Max Dynamic Range: Depends on how many bracketed shots you take - but around 36 stops when a filter is used (see Weta video)
Scan time: Less than 30 seconds with a good panohead
Max Resolution: This method can produce very high-resolution HDRI maps. It depends on a few factors - your lens viewing angle and how many directions you shoot and stitch, plus the resolution of the DSLR being used.
Cost: Here are current prices for a high-end solution with gear that Weta recommends
Camera Body: Canon 5D body - £2,869
Sigma 8mm Fisheye Lens - £699
360 Precision Panohead for Atome Sigma 8mm f3.5 - £245
Total: £3,813
you also will need a suitable tripod
Pros
- Fast capture time
- Mid-level pricing
- The highest quality final result
Cons
- It will require mastery of the camera and settings to reliably capture all of the shots to merge into a HDRI map.
- You need to be very organized in your shoots to make it easy to know what sets of images to merge and to ensure you have all of the shots required.
Useful Websites and Content:
The Definitive Weta Digital Guide to IBL
Polyhaven: How to Create High Quality HDR Environments
Cave Academy: Shooting a HDRI Onset for CG Lighting
Unity: An artist-friendly workflow for panoriamic HDRI - PDF file
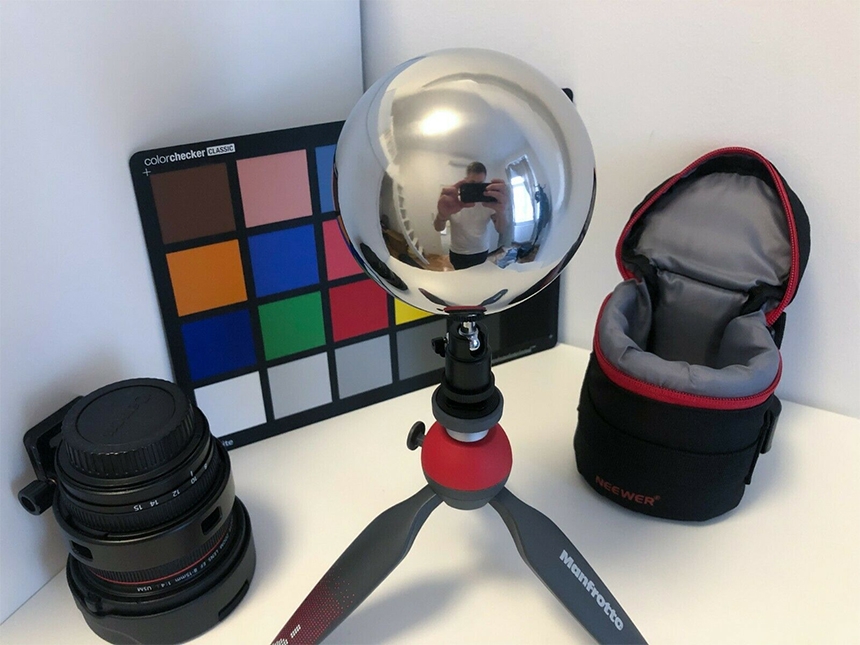
For a quick and dirty way to make a HDRI map, you can shoot bracketed shots of a chrome ball - merge the images into a HDRI and then convert it to the lat-long format. Or many software packages support this 'probe' image format, which is a tight crop on just the ball within the shot, so you don't have to convert it to lat-long. But lat-long is my preferred format to work with.
The process is very simple. Place the chrome ball in the center of the location you want to capture. Shoot it from the location where the camera will be placed for the actual shot. You will get the best resolution from the area of the chrome ball facing the camera, and the edges of the ball will produce a far lower quality blurry result.
This method is not perfect. But it's a really fast way to get some reference lighting and reflections for a scene.
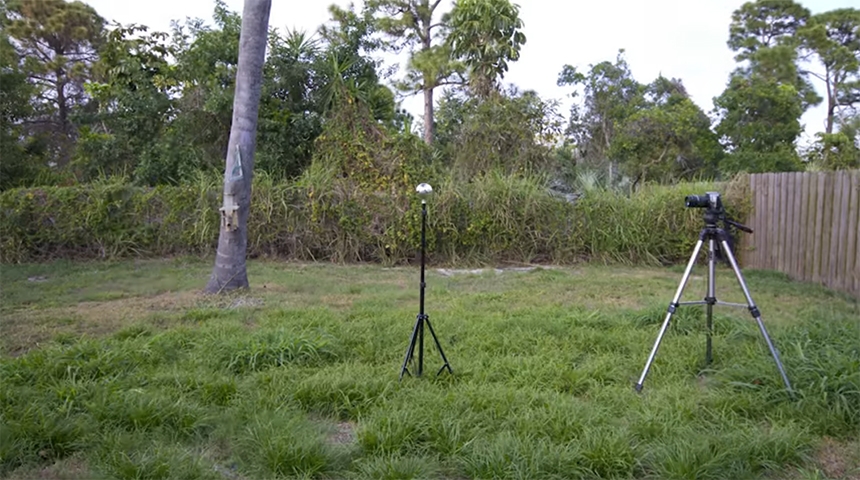
Technical Information:
Max Dynamic Range: Depends on how many bracketed shots you take
Scan time: A few seconds
Max Resolution: Depends on the camera used, the edges of the ball will produce very blurry-looking reflections, even if the camera is super high resolution.
Cost: You can use your existing camera, as long as it can shoot bracketed sets of images. You can make a chrome ball from a Christmas decoration and other chrome ball items you can find, but there are chrome balls available specifically for this. Here is one for sale here on ebay priced at @£155.
Pros
- Super fast capture time
- Can place ball in small and awkward locations and shoot it to make a HDRI
- Low cost
Cons
- Low-quality HDRI map where the best resolution is in the area facing the camera, glancing angles will be blurry and there will be an area behind the ball without any coverage at all.
Useful Content:
This entertaining video takes you through the process in full: How To Create Your Own HDRI Map Using A Chrome Ball
So far we have been exploring methods for photographically capturing an HDRI map of a real location. But it's possible to make an HDRI map of a virtual location, i.e. a scene in your 3D software.
Most renderers now support the option to render a spherical projection view of a scene - basically directly rendering an HDRI map from the camera location. But if you already have the scene modeled in 3D, why would you need an HDRI map of it for lighting purposes? You could just render views from within the scene without any HDRI map at all.
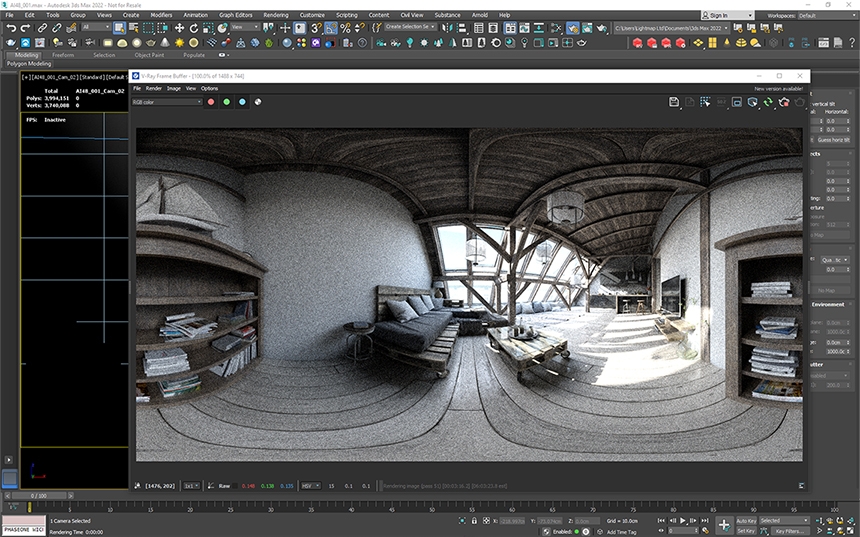
That's why the main use for rendering with the spherical camera in 3D software is to generate 360-degree images that can be viewed on the web and over social media even, like Facebook. They are a great way to provide a more interactive way to explore 3D spaces, from a central viewpoint.
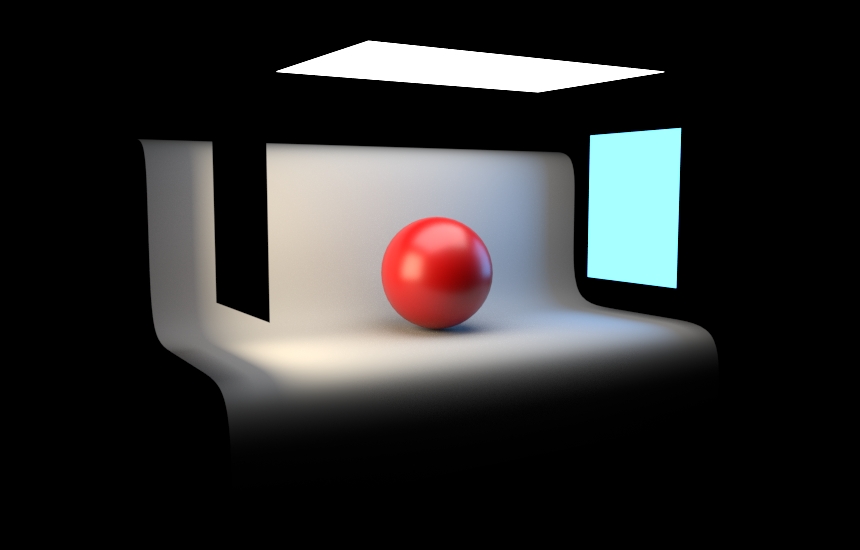
Now let's bring this back to HDRI maps for lighting computer graphics. One type of lighting that is very useful to be able to create is studio lighting with various designs of studio lights - soft boxes and spot lights for example. You can build a lighting setup in your 3D software and then generate an HDRI map of the lighting setup using the spherical camera mode. When this lighting setup is rendered to an EXR file, that is a high dynamic range, you have then made your own HDRI map that can be used for studio lighting.
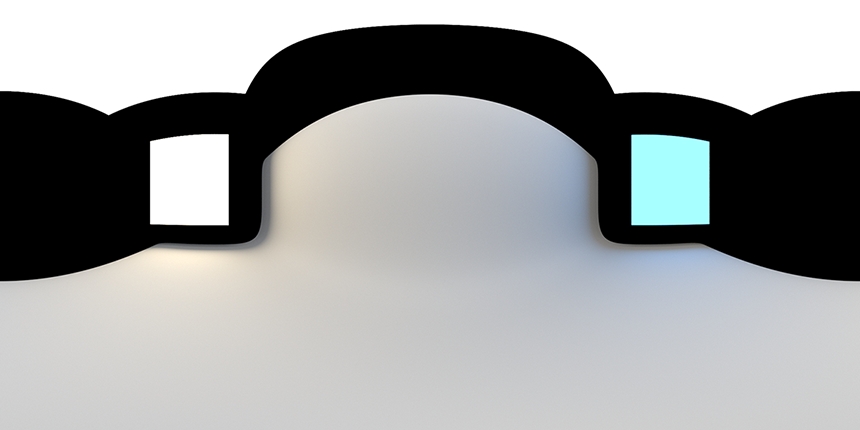
To set the camera to render a spherical image is usually a matter of changing one setting, to choose the spherical mode in its settings. Make sure the render resolution has a ratio of 2:1, so that the HDRI map produced has the right aspect ratio for an HDRI map.
Now for the final approach to making your own HDRI maps.
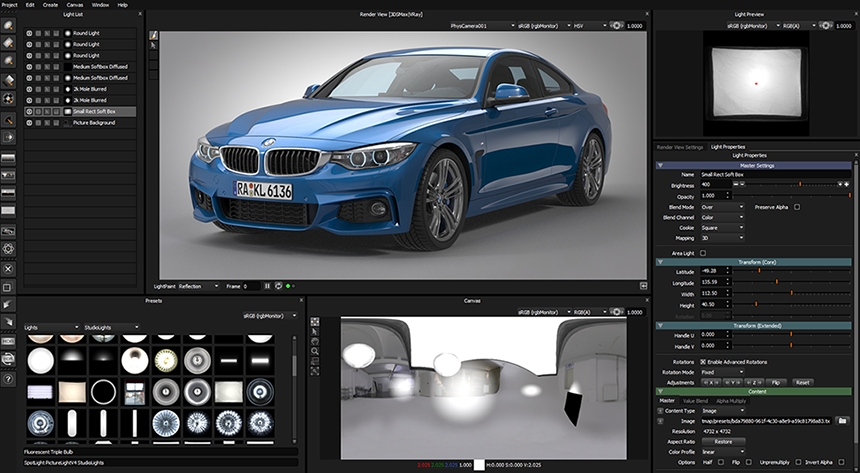
HDR Light Studio is an application dedicated to the authoring and editing of HDRI maps to use for 3D lighting in rendering software. The software features an HDR Canvas where lights can be dragged and dropped from the library. Lights are positioned where you need them by clicking on the 3D model where the lighting effect is wanted. HDR Light Studio does the rest and calculates the location on the HDRI map where to put the light. This feature is called LightPaint.
Things get exciting when HDR Light Studio is linked live with your 3D software via the included plugins. As lights are added and moved in HDR Light Studio, the live HDRI map is shared and updated in real-time in your 3D software. This provides an interactive way to create and edit existing HDRI maps, whilst seeing the final results in your interactive render.
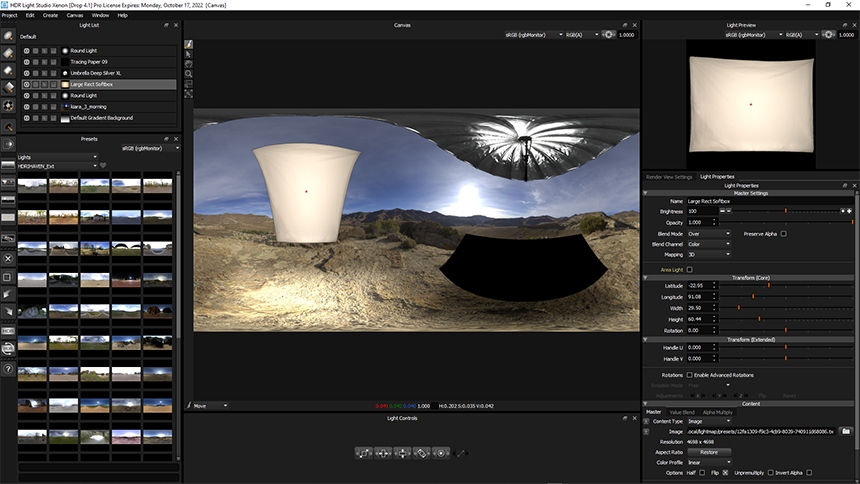
You can use HDR Light Studio to edit HDRI maps created with any of the methods above, by adding new lights, blocking lights, making color adjustments, and much more. Allowing you to take full creative control over the lighting effect of the HDRI map. You can even mix parts of different HDRI maps to create a new composite HDRI that is totally unique.
Pros
- Quickly author, edit and mix HDRI map content with ease
- Ideal for generating complex studio lighting
- Live editing of HDRI maps you have shot to control their lighting effect on your 3D scenes
- Click on the model to put lights and adjustments where needed
- Includes a large library of HDR lighting content to use in your lighting designs
Cons
- This software does not help with the process of photographically capturing a HDRI map, for that you need other tools like PTGUI
Conclusion
There are many ways to make your own HDRI maps to use for CG lighting that we have seen above. They vary a lot in the speed of the capture/creation process, any post-processing required after the shoot, the quality of the final HDRI map, and the cost of the hardware and software needed. Being aware of all of these methods will allow you to try at least one of them and make your very first HDRI map for CG lighting. Happy lighting!
Written by Mark Segasby - Co-founder, Lightmap
This entry was posted in Lighting Demos, Tutorials and Tips.


